Gas Detection System with Arduino Uno R4 WiFi, Servo Motor, and Voice Alert.
In this project, I will show you how to gradually open and close a door and play an MP3 fi le when gas is detected. We will use the Arduino Uno R4 WiFi board, an MQ-2 gas and smoke sensor, the DFPlayer Mini module, and an SG92R servo motor.

Check the video below for demonstration
When gas is detected, the DFPlayer Mini module will play MP3 fi le number 3 from the SD card, which says “Gas has been detected”, and the door will gradually open so the gas can escape from the house.
Parts Required
Below is the list of all components used in this project:
- Arduino Uno R4 WiFi
- MQ-2 gas & smoke sensor
- SG92R Servo Motor
- 20 Ω, 1 W Speaker
- DFPlayer Mini Module
- External Power Supply
- SD Card
- White LED
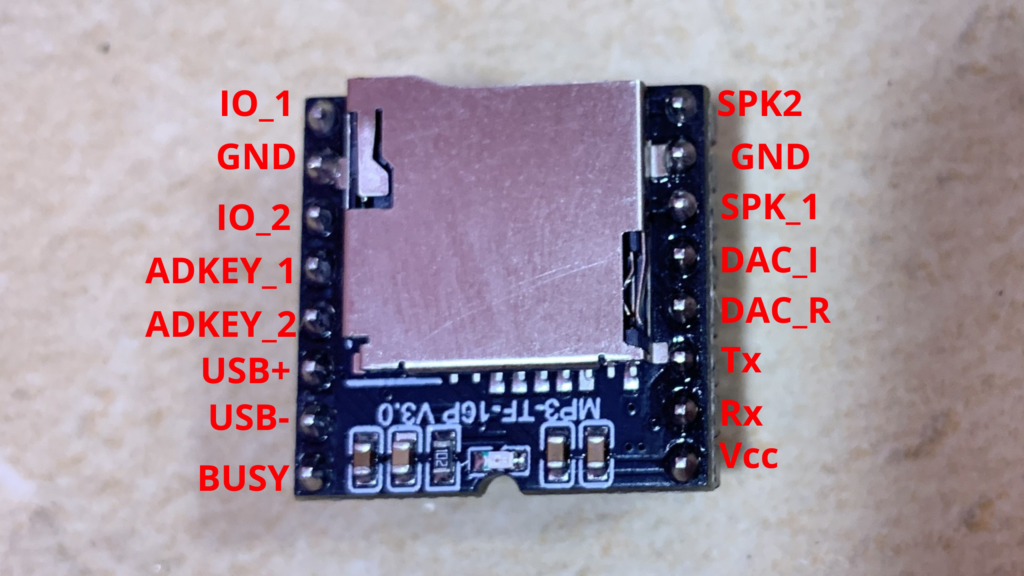
DFPlayer Mini
The DFPlayer Mini is a small and easy-to-use audio playback module capable of playing MP3, WAV, and WMA fi les. It provides a built-in audio output that can be connected directly to a speaker. The module uses a micro SD card for storage, supporting cards up to 32 GB formatted in FAT16 or FAT32. It operates on a 3.2 V to 5 V DC power supply and communicates with the microcontroller through the UART serial interface.
Preliminary Steps
Before getting started with the DFPlayer Mini module, there are a few important preparations to consider.
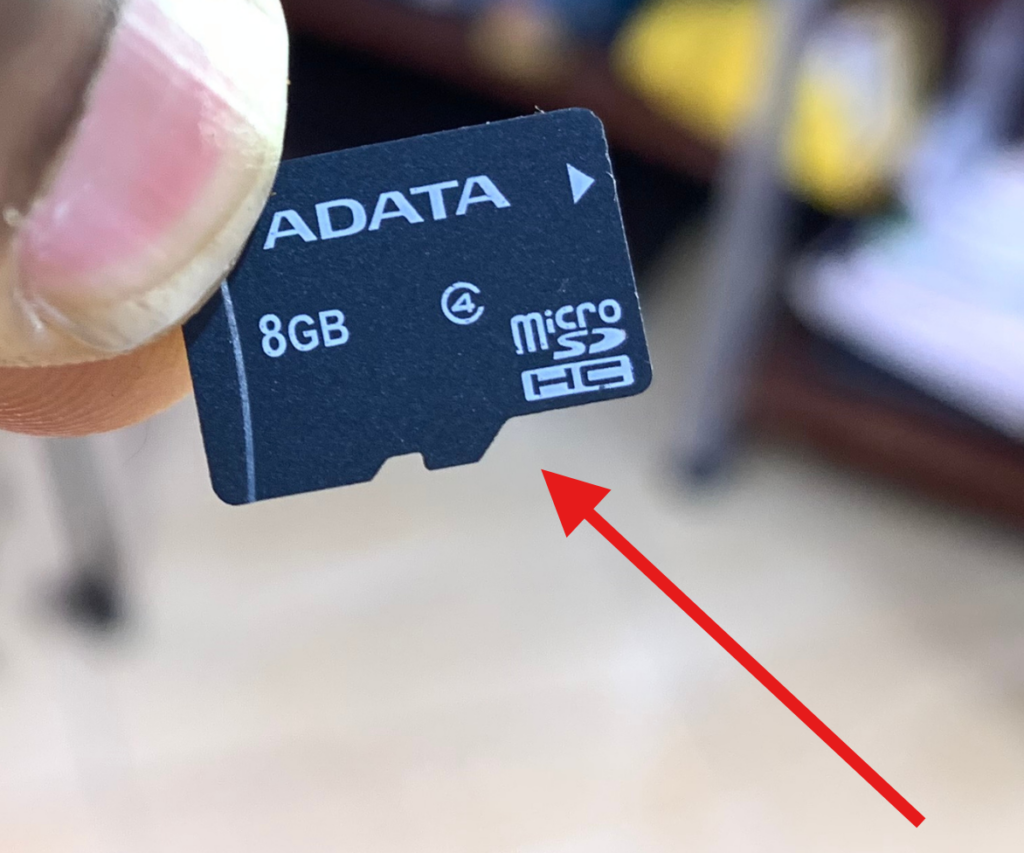
SD Card & MP3 File
You will need an SD card (maximum 32 GB) and an MP3 file that will play when gas is detected.
How to Copy Audio Files to the SD Card
Format the SD Card: Make sure your micro SD card is formatted using FAT16 or FAT32. Organize Folders: Rename standard folders using numbers like 01, 02, 03 … up to 99.
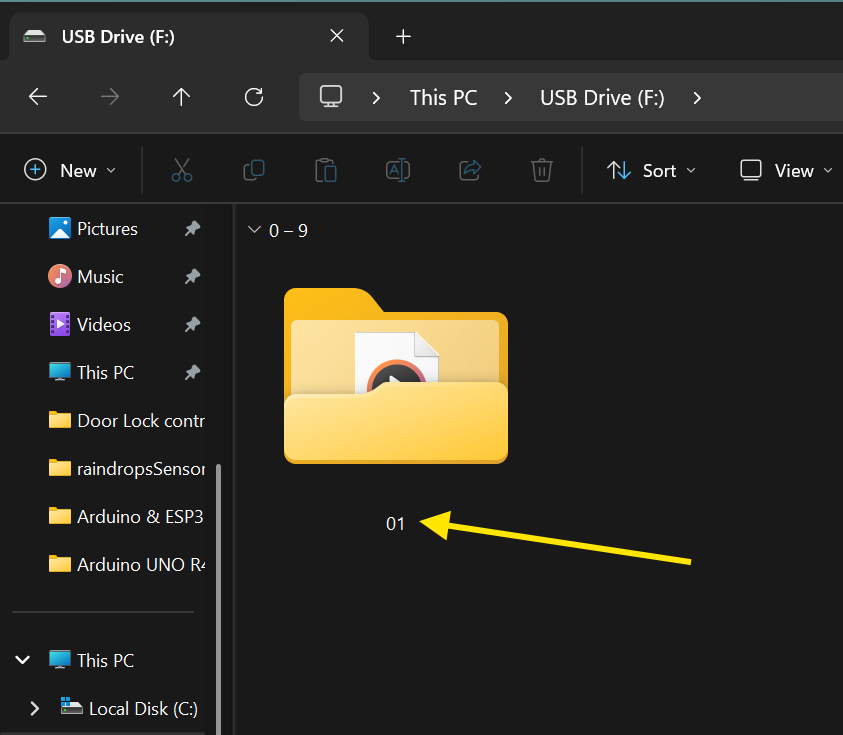
Rename Audio Files: Audio fi les inside these folders should be renamed as 001.mp3, 002.mp3, 003.mp3 … up to 255.mp3. You can also use WAV format (001.wav, 002.wav, etc.).
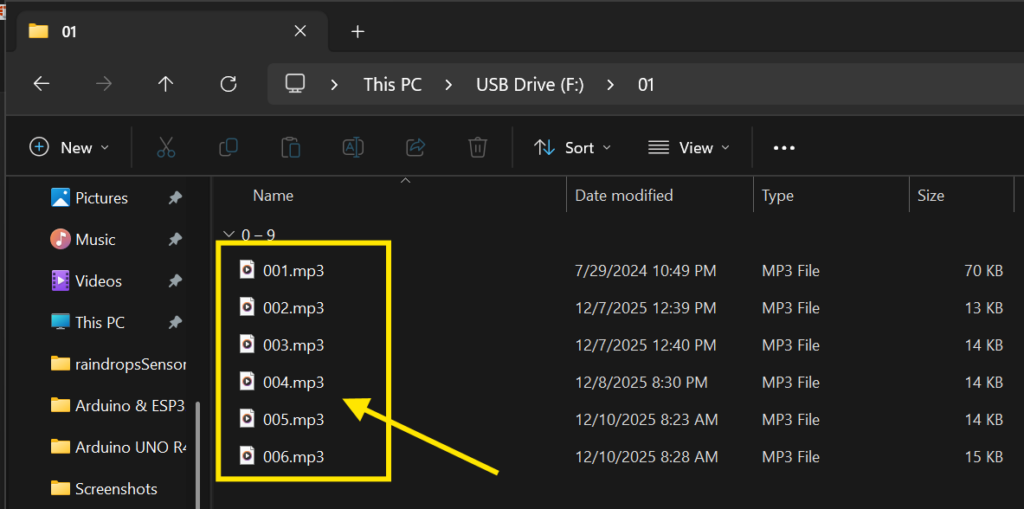
We will use the audio 002.mp3 in this project.
Optional File Naming: You may keep the original fi le name while adding a number prefi x. For example, if the original fi le is “Yesterday Once More.mp3”, rename it to 001Yesterday Once More.mp3.
For this project, I created my audio fi les using TTSMaker. Below, I have provided the audio fi le used in this project.
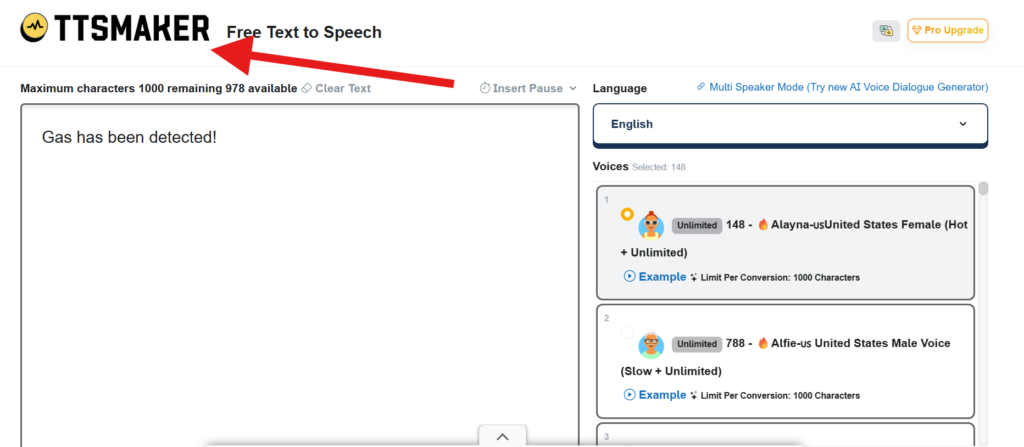
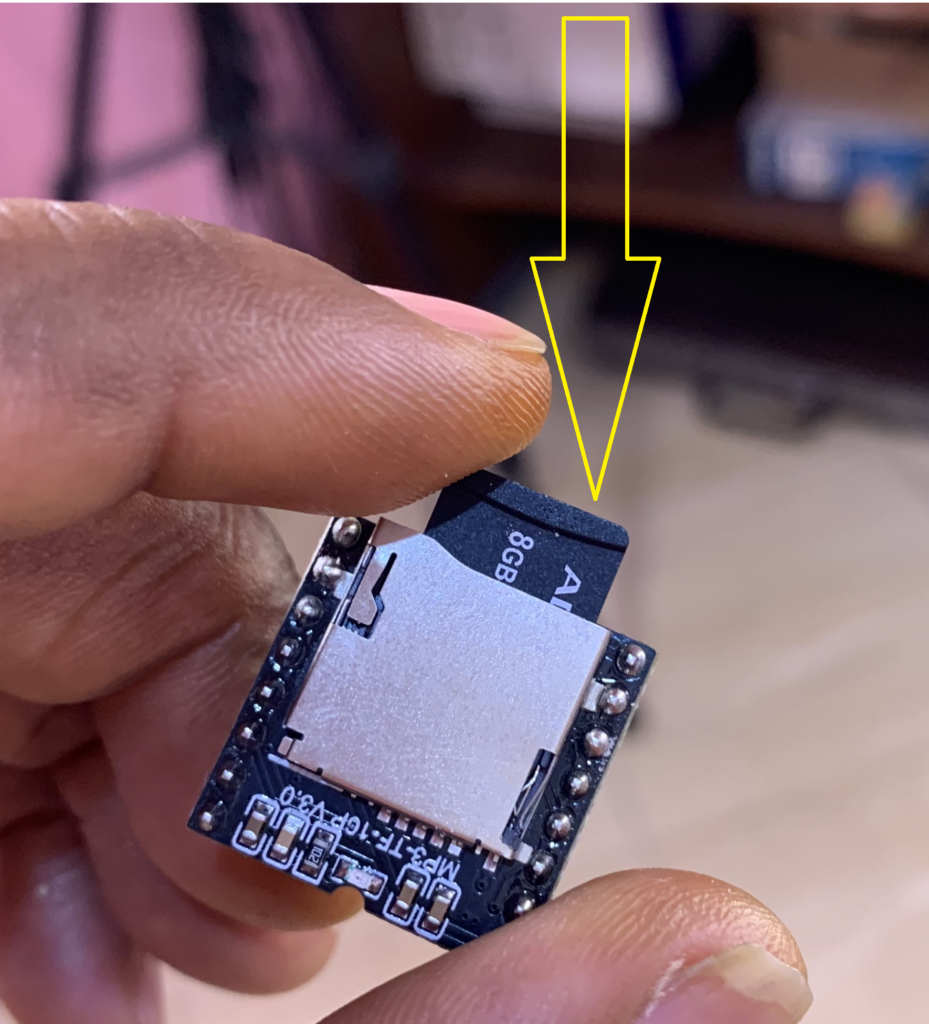
After creating the audio fi les using TTSMaker and copying them to the SD card, don’t forget to insert the SD card into the DFPlayer Mini.
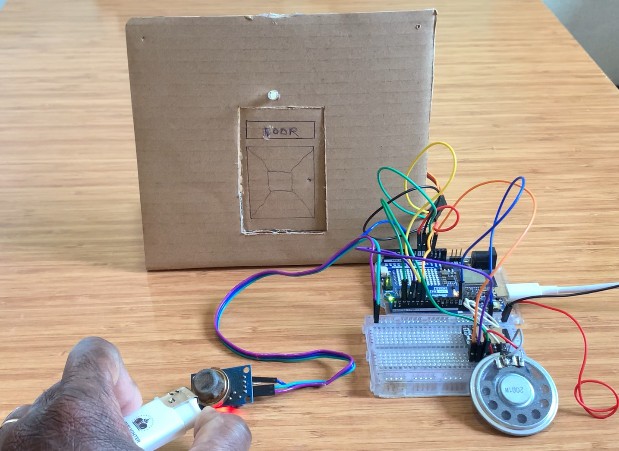
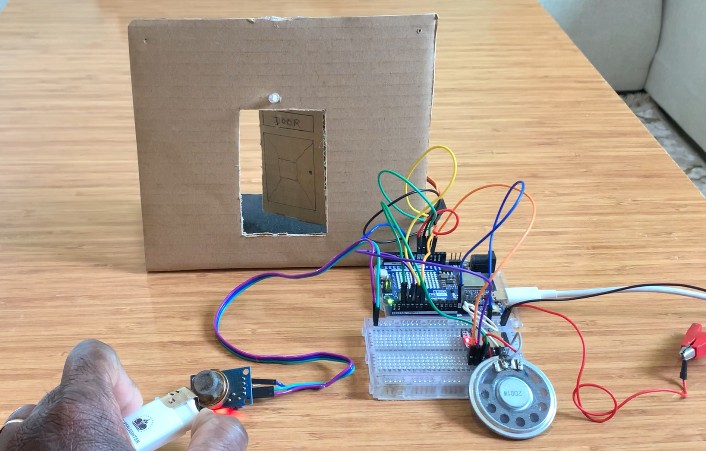
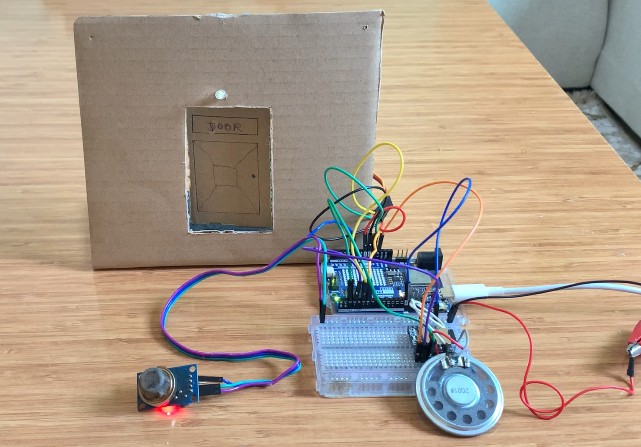
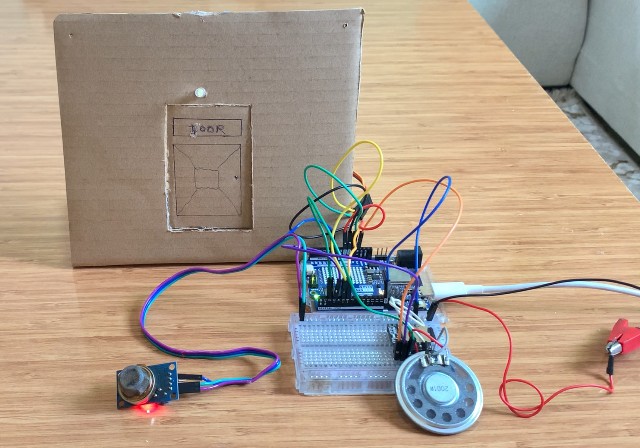
DIY Home Door
The door used in this project is made out of cardboard, as I don’t have a 3D printer. To create it, I drew the door shape on the cardboard using a pen and ruler. Then, I carefully made the necessary cuts with a sharp knife to produce a door that can open and close using the SG92R servo motor and the control module.
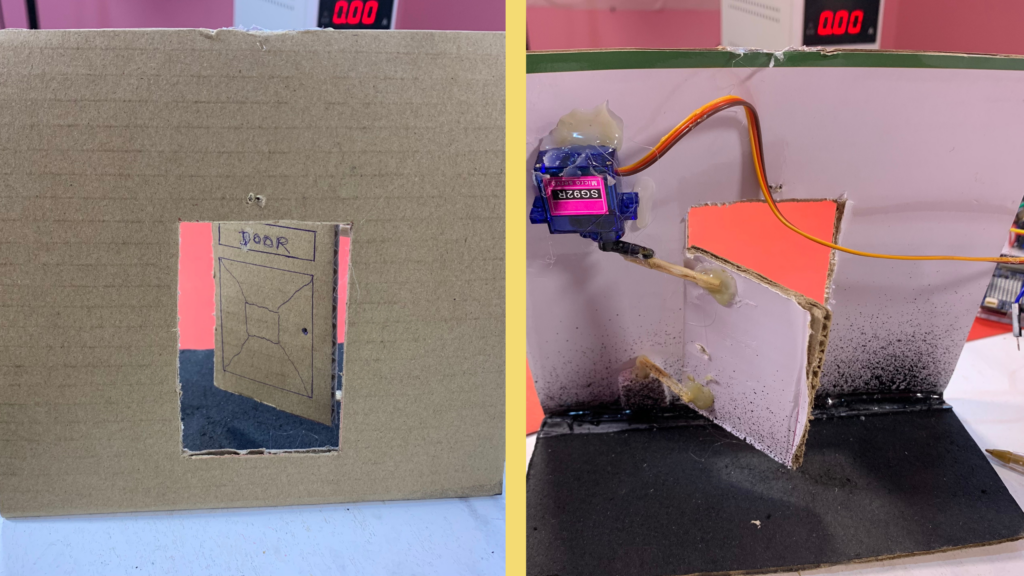
If you want to see a detailed guide on how I built the door, I recommend checking out this blog post:
Arduino Uno R4 WiFi Rain Detection System
Circuit Diagram
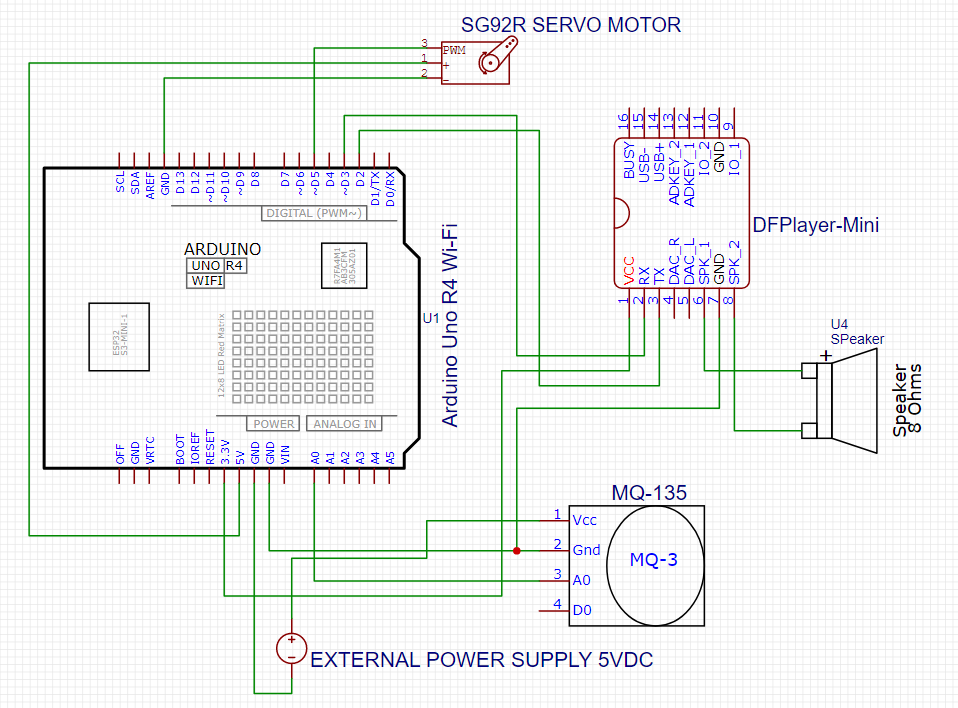
Connections between Arduino Uno R4 WiFi, DFPlayer Mini, and Speaker:
| Arduino Uno R4 WiFi | DFPlayer Mini | Speaker |
| Pin 2 | Tx | |
| Pin 3 | Rx | |
| 3.3V | Vcc | |
| GND | GND | |
| SPK1 | + | |
| SPK2 | – |
Install the DFRobotDFPlayerMini Library
Before using the DFPlayer Mini module, you need to install its library in the Arduino IDE:
- Open the Arduino IDE and go to Library Manager.
- In the search bar, type “DFRobotDFPlayerMini”.
- Locate the library named “DFRobotDFPlayerMini by DFRobot” and install it.
This library allows your Arduino to communicate with the DFPlayer Mini and control audio playback easily.

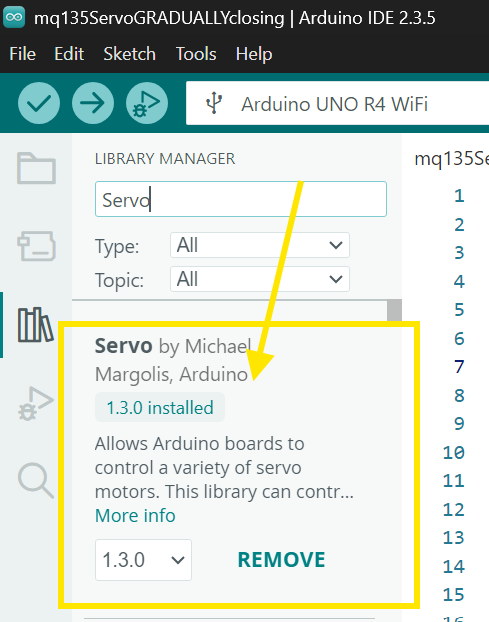
Install the Servo Library
Before controlling the SG92R servo motor, you need to install the Servo library in the Arduino IDE:
- Open the Arduino IDE and go to Library Manager.
- In the search bar, type “Servo”.
- Locate the library named “Servo by Michael Margolis, Arduino” and install it.
This library allows your Arduino to control the servo motor’s position smoothly and accurately.
#include <Servo.h>
#include "SoftwareSerial.h"
#include "DFRobotDFPlayerMini.h"

Servo myservo;

#define whiteLED 6 //I didnt use but you can use it if you want. Its will act like a lightbulb above the door outside
#define SERVO_PIN 5
#define MQ135Sensor A0

SoftwareSerial mySoftwareSerial(2, 3); // RX, TX
DFRobotDFPlayerMini myDFPlayer;

bool gasDetected = false;

// Timing variables
unsigned long doorOpenStart = 0;
const unsigned long doorOpenDuration = 2000;

// Servo smooth movement
int targetPos = 27;            // closed door
int currentPos = 27;
unsigned long lastServoMove = 0;
const unsigned long servoStepInterval = 50; // replaces all the delay(100)

void setup() {
  myservo.attach(SERVO_PIN);
  Serial.begin(115200);

  pinMode(whiteLED, OUTPUT);
  pinMode(MQ135Sensor, INPUT);

  mySoftwareSerial.begin(9600);
  if (!myDFPlayer.begin(mySoftwareSerial)) {
    Serial.println("DFPlayer not initialized!");
  } else {
    myDFPlayer.volume(25);
    Serial.println("DFPlayer OK!");
  }

  myservo.write(currentPos);
}

void loop() {
  int analogValue = analogRead(MQ135Sensor);
  Serial.print("MQ135 Value: ");
  Serial.println(analogValue);

  unsigned long currentMillis = millis();

  // -------------------------------------
  // gas DETECTED
  // -------------------------------------
  if (analogValue > 200) {
    if (!gasDetected) {
      gasDetected = true;

      Serial.println("GAS DETECTED! Door opening...");
      digitalWrite(whiteLED, HIGH);
      myDFPlayer.loop(2);          // play sound in loop

      targetPos = 80;              // open door smoothly
      doorOpenStart = currentMillis;
    }
    else {
      doorOpenStart = currentMillis; // keep door open while gas continues
    }
  }

  // -------------------------------------
  // NO gas
  // -------------------------------------
  if (gasDetected && (currentMillis - doorOpenStart >= doorOpenDuration)) {
    gasDetected = false;

    Serial.println("gas cleared. Closing door.");
    digitalWrite(whiteLED, LOW);
    myDFPlayer.stop();

    targetPos = 27;                // close door smoothly
  }

  // -------------------------------------
  // SMOOTH SERVO MOVEMENT WITH MILLIS
  // -------------------------------------
  if (currentMillis - lastServoMove >= servoStepInterval) {
    lastServoMove = currentMillis;

    if (currentPos < targetPos) currentPos++;
    else if (currentPos > targetPos) currentPos--;

    myservo.write(currentPos);
  }

  // Clear DFPlayer buffer
  if (myDFPlayer.available()) {
    myDFPlayer.readType();
  }
}
How the projects works
When the project starts, the servo motor is positioned at 27°, which represents the door fully closed. The DFPlayer Mini is initialized through software serial communication, the audio volume is set, and the white LED is off.
The Arduino continuously reads the analog value from the MQ135 gas sensor connected to pin A0 and prints it to the Serial Monitor. As long as the sensor value stays below 200, no gas is detected, the door remains closed, and no audio is played. When gas is detected (sensor value above 200), the system sets gasDetected to true.
The white LED turns on as a visual alert, and the DFPlayer Mini starts playing MP3 fi le number 2 in a loop, which says “Gas has been detected.” The servo’s target position is set to 80°, causing the door to begin opening gradually.
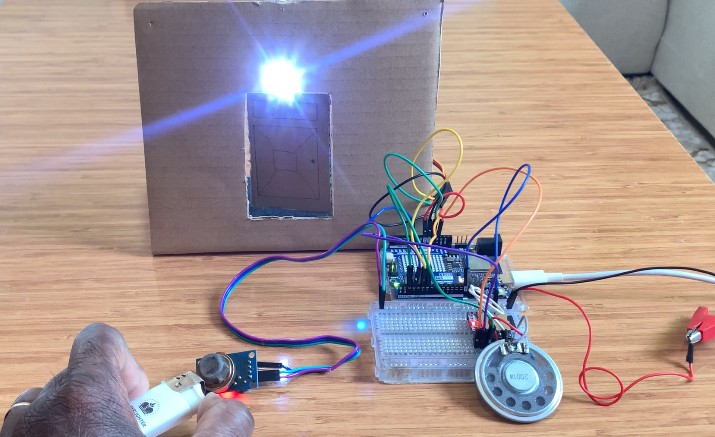
The servo moves smoothly by increasing its angle one degree at a time every 50 milliseconds until it reaches the target position. This creates a gradual and controlled opening motion. When the servo reaches 80°, the door is fully open, allowing the gas to escape while the audio alert continues to play as long as gas is present.
While gas continues to be detected, the timer is constantly refreshed, keeping the door open and the alert active. Once the gas clears and the sensor value drops below the threshold for at least 2 seconds, the system stops the audio, turns off the white LED, and sets the servo target position back to 27° to close the door gradually.
Finally, when the servo reaches 27°, the door is fully closed again. The system returns to standby mode, ready to detect gas again if it appears.
Svp j’ai besoin de la vidéo de conception complète
Il y a des tutorils sur le site des informations pour cela.
Hola, quería saber tu precio..
¿Quieres comprar el proyecto?
Ողջույն, ես ուզում էի իմանալ ձեր գինը.