Ultrasonic Water Level Monitoring with Arduino and OLED
In this tutorial, we’ll examine how to use an ultrasonic sensor to measure water depth and use an Arduino Uno to display the data on an OLED screen. In order to determine the water level within a container, the project employs the HC-SR04 ultrasonic sensor to detect the distance between the sensor and the water’s surface. The detected water depth is shown in real time on an OLED display that is installed on the container’s exterior. For novice and intermediate Arduino users who wish to learn about distance measuring, sensor integration, and real-time data display, this straightforward and useful project is perfect.
We also have other tutorials on HC-SR04 module:
Arduino Distance Measurement with Audio | Ultrasonic Sensor + DFPlayer Mini
Watch the video
You might want to watch the video tutorial or keep reading this page for the written instructions.
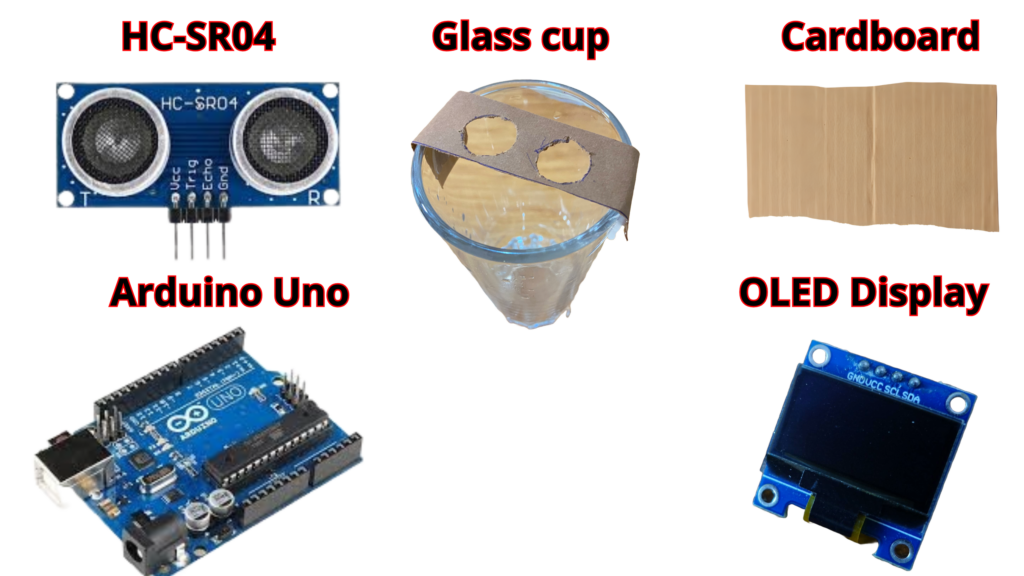
Parts required
- Arduino Uno
- Ultrasonic Sensor(HC-SR04)
- OLED Display
- Glass cup(optional)
- Cardboard(optional)
- Hot glue(optional)
Hardware Construction and Sensor Mounting
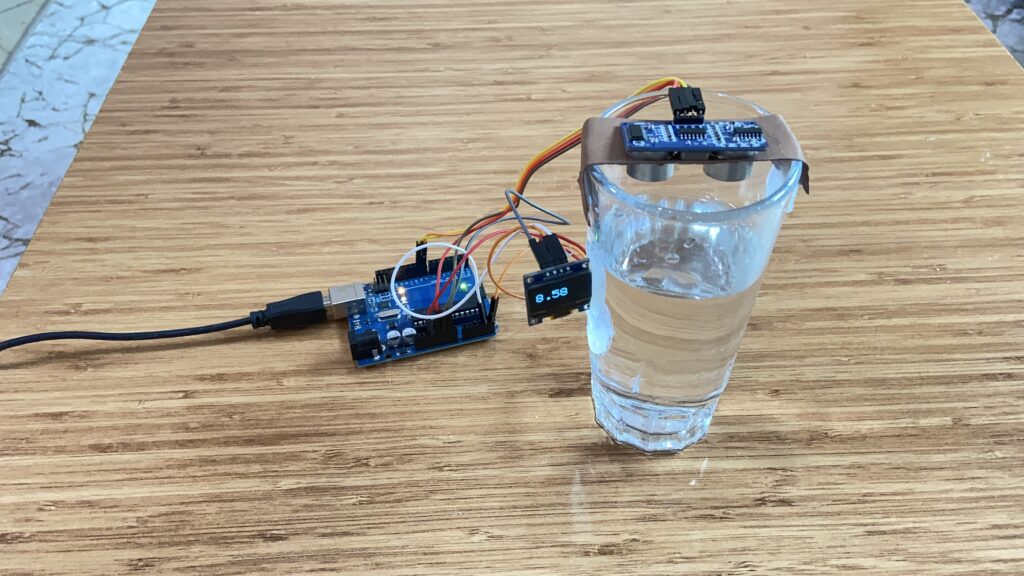
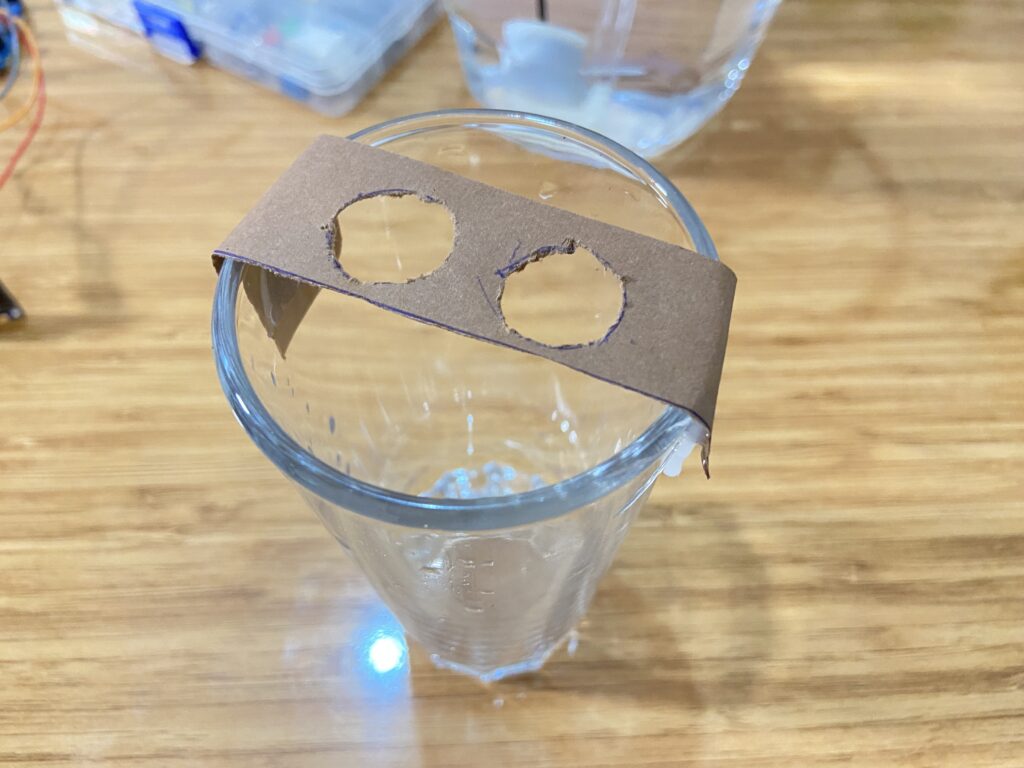
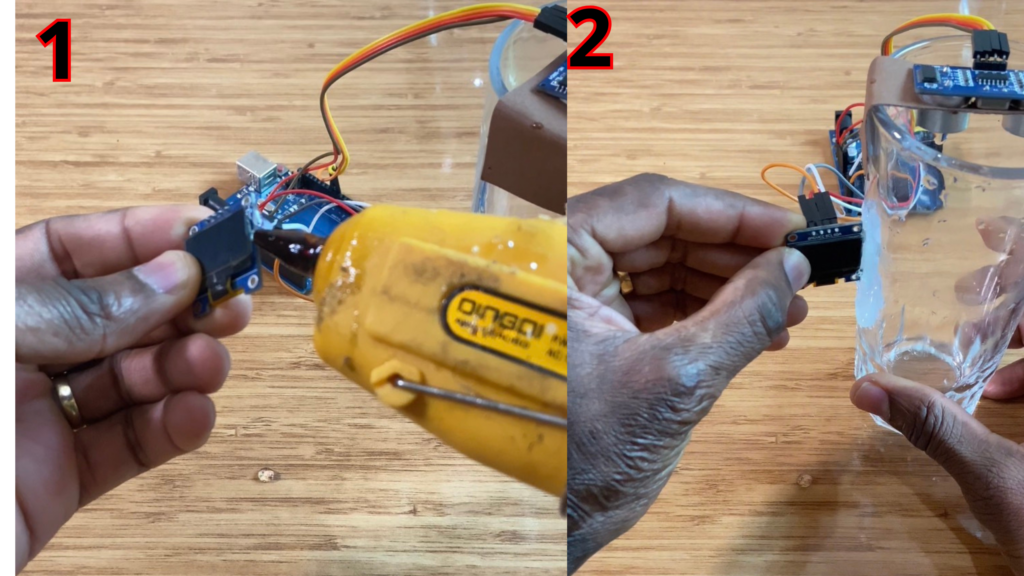
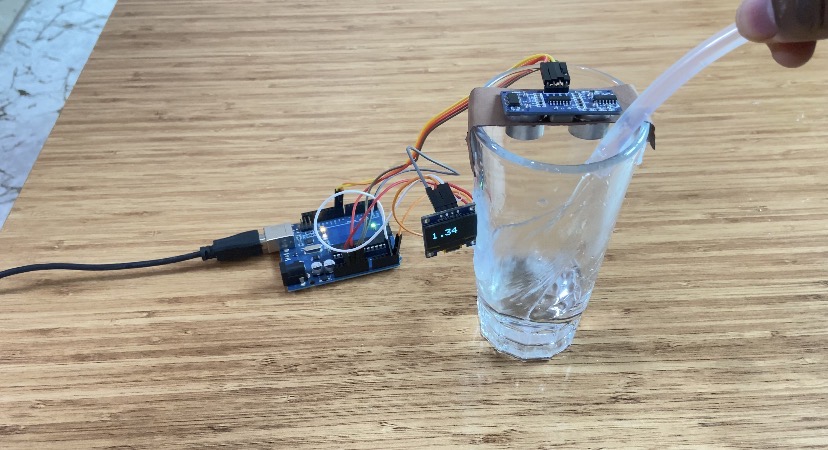
I took a piece of cardboard and cut a circular opening for the ultrasonic sensor. I glued the cardboard on top of a glass cup.
I mounted the ultrasonic sensor, connected to an Arduino Uno, onto the cardboard using hot glue.
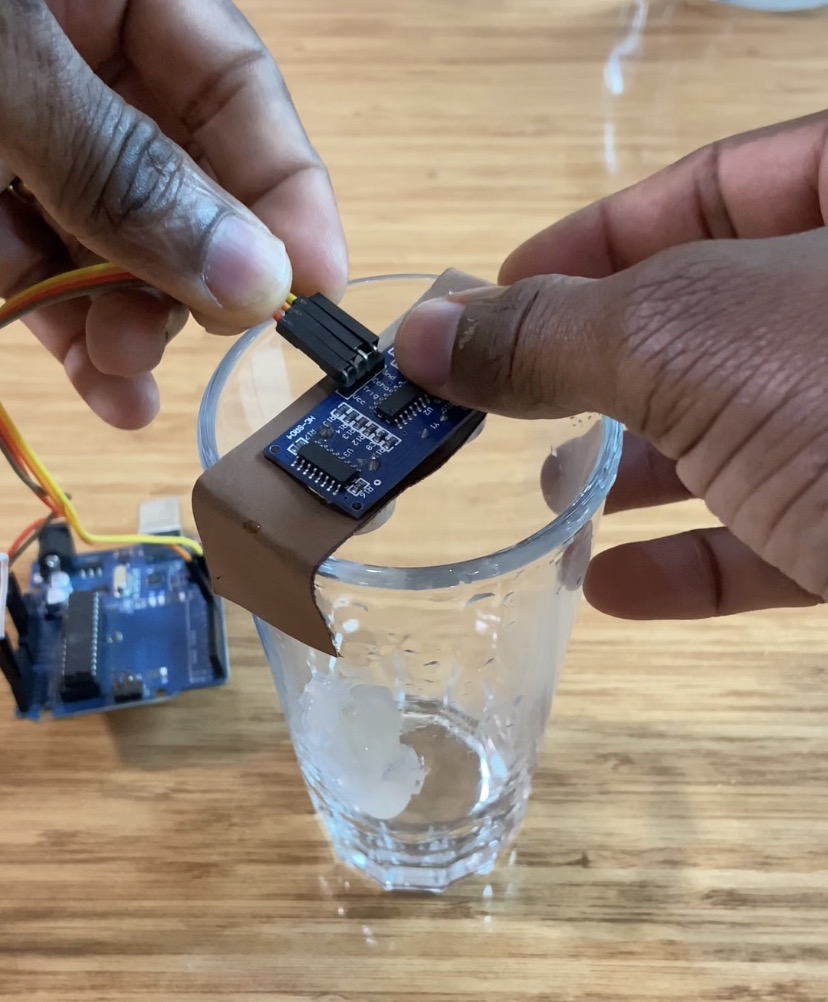
After that, I attached an OLED display to the outside of the glass cup so that the water depth inside the cup could be measured and displayed in real time on the OLED screen.
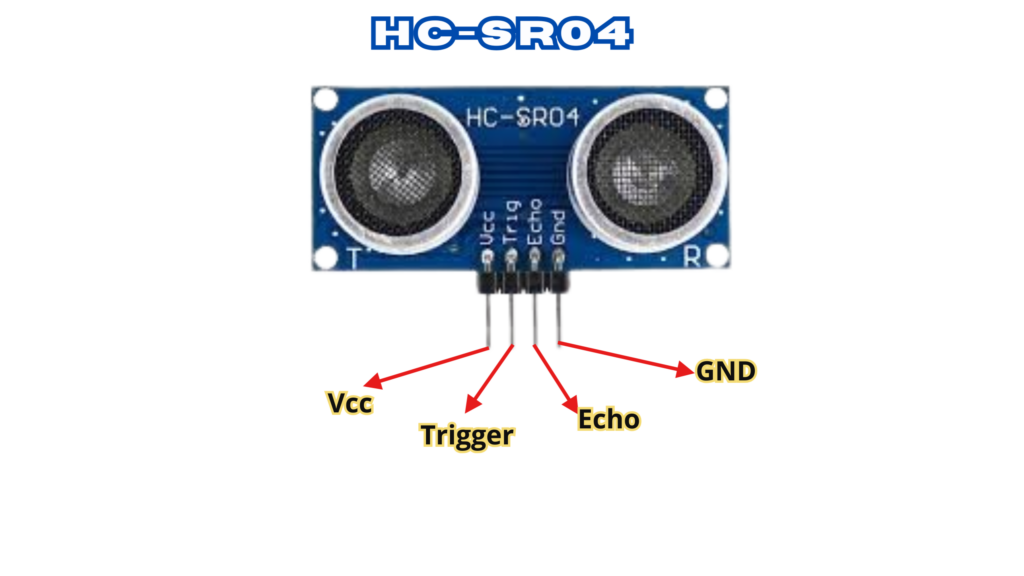
Ultrasonic Sensor (HC-SR04)
The HC-SR04 is one of the most popular ultrasonic sensors used in distance measurement projects. This sensor emits ultrasonic waves and calculates the time it takes for the waves to return after hitting an object, determining the distance.
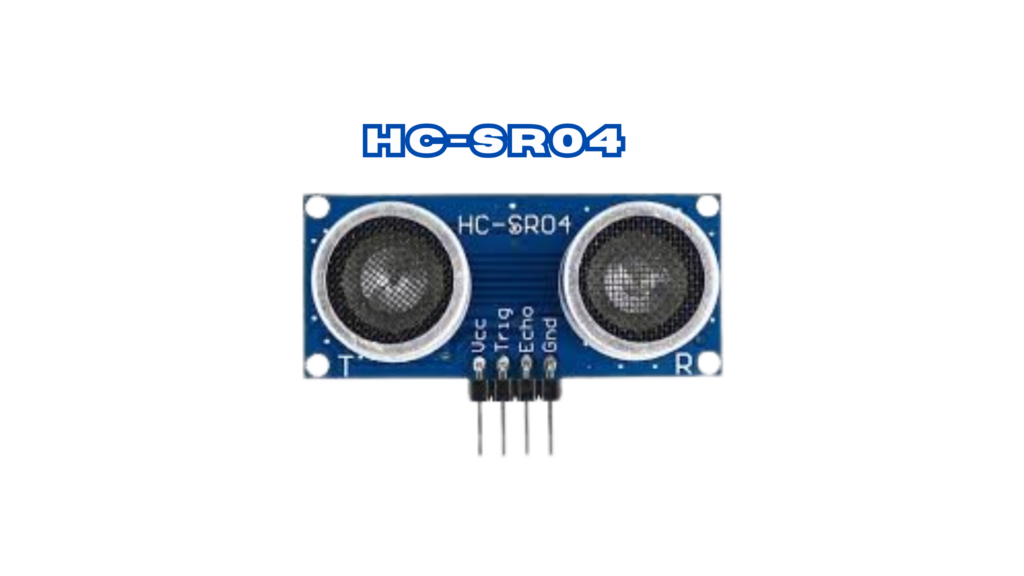
- VCC – 5V power supply
- TRIG – Trigger pin sends out ultrasonic pulses
- ECHO – Echo pin listens for the refl ected signal
- GND – Ground
Specifications
- Power Supply: 5V DC
- Current Consumption: 15mA
- Operating Frequency: 40Hz
- Measurement Range: 2cm to 400cm
- Resolution: 0.3 cm
- Measurement Angle: 15 degrees
- Trigger Pulse Width: 10μs
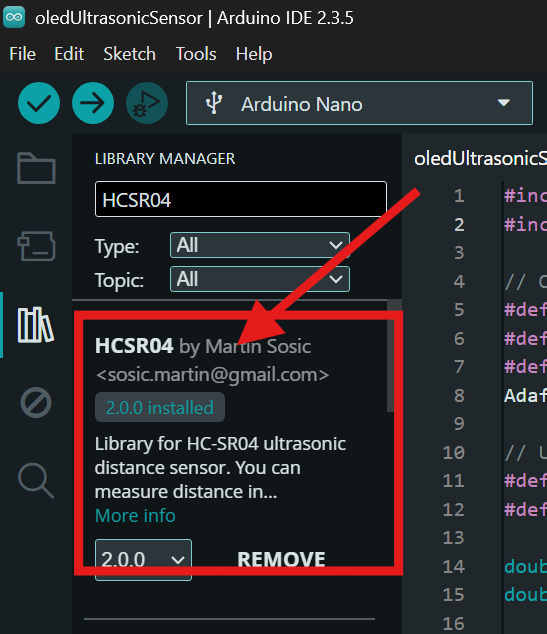
Install the HCSR04 Library
Make sure to install the HCSR04 library to measure distance using the HC-SR04 ultrasonic sensor with Arduino boards.
- Open the Arduino IDE.
- Click on Sketch → Include Library → Manage Libraries…
- In the Library Manager search bar, type “HCSR04”.
- Look for the library named “HCSR04” (commonly listed as HCSR04 by Martin Sosic).
- Click Install to add the library to your Arduino IDE.
After installation, the library allows you to easily read distance values from the HC-SR04 ultrasonic sensor using simple functions.
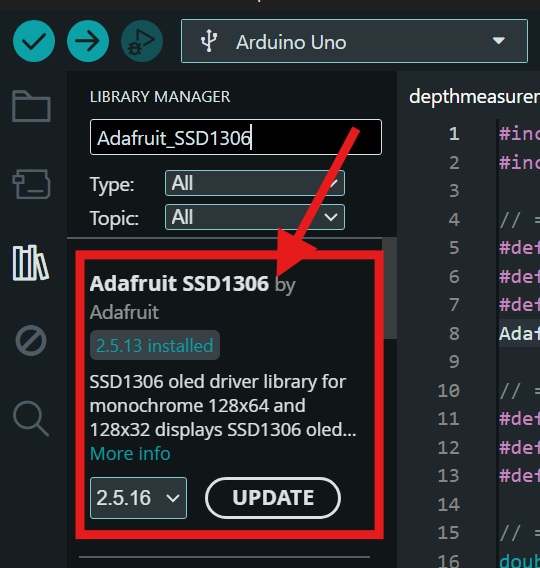
Install the Adafruit_SSD1306 Library
Make sure to install the Adafruit_SSD1306 library to control OLED displays based on the SSD1306 driver using Arduino boards.
- Open the Arduino IDE.
- Click on Sketch → Include Library → Manage Libraries…
- In the Library Manager search bar, type “Adafruit SSD1306”.
- Look for the library named “Adafruit_SSD1306 by Adafruit”.
- Click Install to add the library to your Arduino IDE.
Note: This library also requires the Adafruit GFX Library. The Arduino IDE will prompt you to install it automatically—make sure to install it as well.
Circuit Diagram

Arduino Code
#include <Adafruit_SSD1306.h>
#include <HCSR04.h>

// ================= OLED CONFIG =================
#define SCREEN_WIDTH 128
#define SCREEN_HEIGHT 64
#define OLED_RESET -1
Adafruit_SSD1306 display(SCREEN_WIDTH, SCREEN_HEIGHT, &Wire, OLED_RESET);

// ================= PIN DEFINITIONS =================
#define TRIGGER_PIN 8
#define ECHO_PIN 9
#define BUZZER_PIN 2

// ================= VARIABLES =================
double distance_cm, depth;
double reference_distance = -1;
const double DEPTH_OFFSET_CM = 3.43;   // <-- correction offset

// Ultrasonic sensor
UltraSonicDistanceSensor distanceSensor(TRIGGER_PIN, ECHO_PIN);

// Non-blocking buzzer control
unsigned long previousBuzzerMillis = 0;
const unsigned long buzzerInterval = 100;
bool buzzerState = false;

// OLED update control
unsigned long previousOLEDMillis = 0;
const unsigned long oledUpdateInterval = 250;

void setup() {
  Serial.begin(9600);

  pinMode(BUZZER_PIN, OUTPUT);
  digitalWrite(BUZZER_PIN, LOW);

  // OLED init
  if (!display.begin(SSD1306_SWITCHCAPVCC, 0x3C)) {
    while (true); // Stop if OLED fails
  }

  display.clearDisplay();
  display.setTextColor(SSD1306_WHITE);
}

void loop() {
  distance_cm = distanceSensor.measureDistanceCm();
  unsigned long currentMillis = millis();

  Serial.print("Measured Distance: ");
  Serial.println(distance_cm);

  // Set reference distance once
  if (reference_distance < 0 && distance_cm > 0) {
    reference_distance = distance_cm;
    Serial.print("Reference Distance Set: ");
    Serial.println(reference_distance);
  }

  if (reference_distance > 0 && distance_cm > 0) {

    // ===== DEPTH CALCULATION WITH -3cm CORRECTION =====
    depth = (reference_distance - distance_cm) - DEPTH_OFFSET_CM;
    if (depth < 0) depth = 0;

    // ================= OLED UPDATE =================
    if (currentMillis - previousOLEDMillis >= oledUpdateInterval) {
      previousOLEDMillis = currentMillis;

      display.clearDisplay();
      display.setTextSize(3);
      display.setCursor(10, 20);
      display.println(depth, 2);
      display.display();
    }

    // ================= BUZZER CONTROL =================
    if (depth >= 8.50) {
      if (currentMillis - previousBuzzerMillis >= buzzerInterval) {
        previousBuzzerMillis = currentMillis;
        buzzerState = !buzzerState;
        digitalWrite(BUZZER_PIN, buzzerState);
      }
    } else {
      digitalWrite(BUZZER_PIN, LOW);
      buzzerState = false;
    }

  } else {
    // ================= NO DATA DISPLAY =================
    display.clearDisplay();
    display.setTextSize(2);
    display.setCursor(10, 25);
    display.println(F("No data"));
    display.display();

    digitalWrite(BUZZER_PIN, LOW);
    buzzerState = false;
  }
}
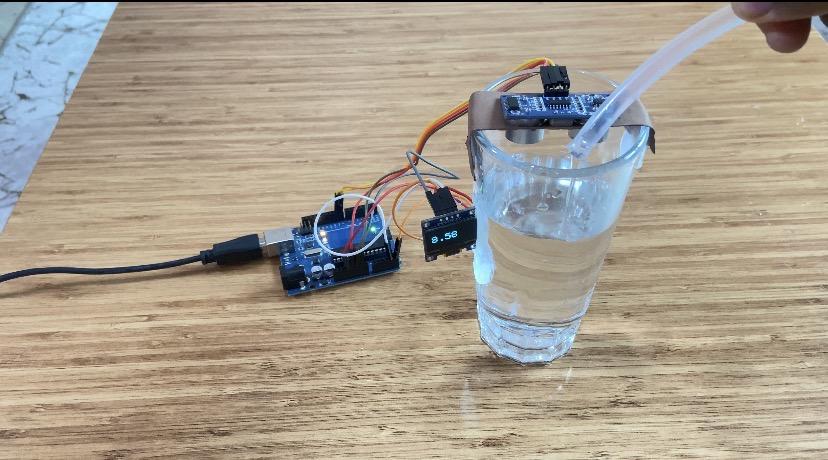
How the project works?
The ultrasonic sensor continuously measures the distance between the sensor and the surface below it.
This first measurement is saved as a reference distance, representing the initial level.
As the distance changes, the system calculates the depth difference using a correction offset.
When the calculated depth reaches or exceeds 8.50 cm, the system activates the buzzer as a warning.
The buzzer beeps in a non-blocking way, allowing the system to keep measuring accurately.
If the depth goes below the threshold, the buzzer stops automatically.
This behavior makes the system suitable for level monitoring and safety alerts.