Wireless Light Control with Arduino using LoRa SX1278
This project demonstrates a wireless light control system using Arduino and LoRa SX1278 modules. LoRa (Long Range communication) allows data transmission over long distances with low power consumption, making it ideal for remote control applications.
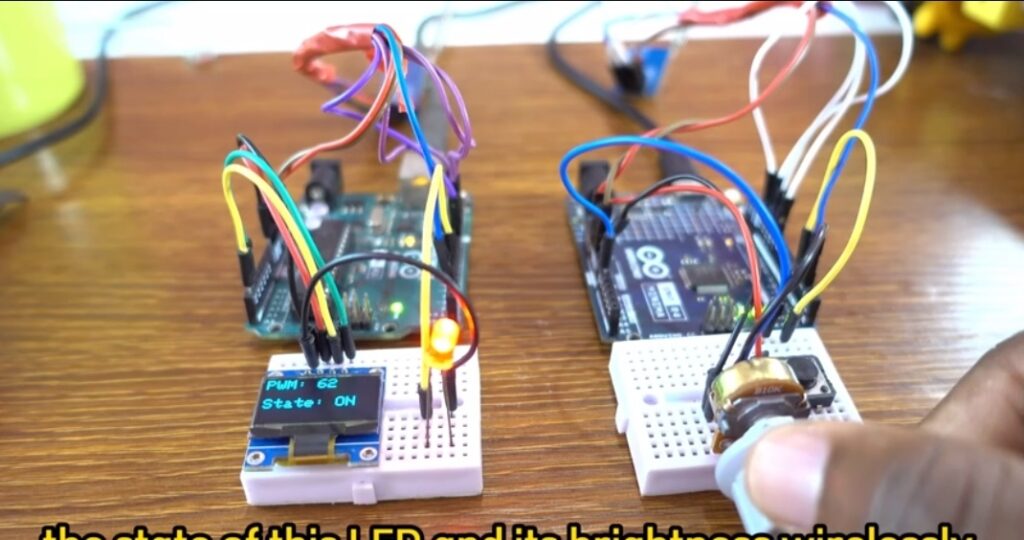
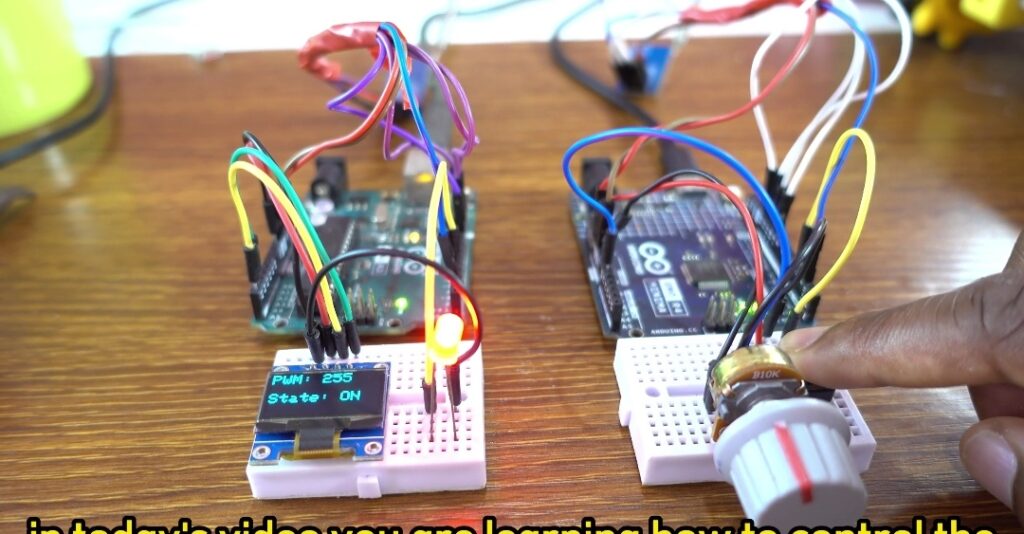
In this setup, a transmitter Arduino (Uno R4 Minima) reads input from a potentiometer and a pushbutton, then sends the data wirelessly using a LoRa module. The receiver Arduino (Uno) processes the received data to control the brightness and state of a red LED.
An OLED display is also used on the receiver side to show real-time values such as PWM level and LED status, making the system interactive and easy to monitor.
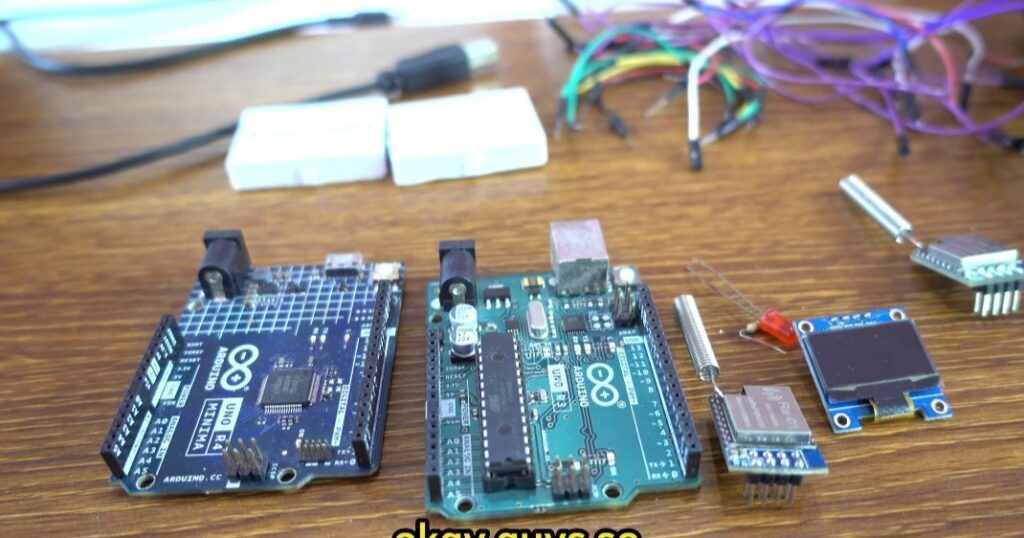
Components Used
- 2x LoRa SX1278 Modules – Wireless communication between transmitter and receiver
- Arduino Uno R4 Minima (Transmitter) – Sends control signals
- Arduino Uno (Receiver) – Receives and processes data
- Red LED – Output device controlled wirelessly
- OLED Display (SSD1306) – Displays PWM value and LED state
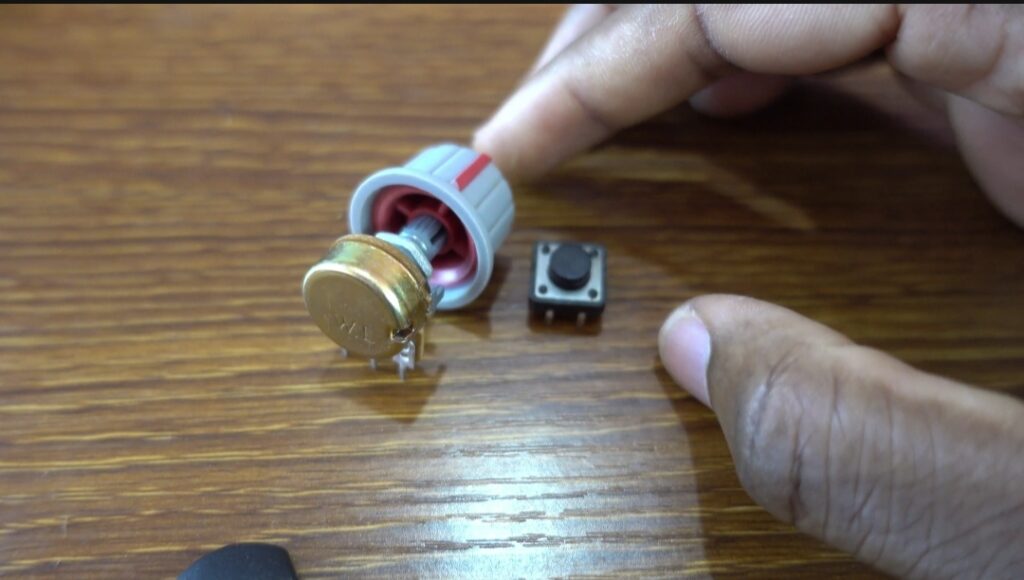
- 10K Potentiometer – Controls LED brightness
- Pushbutton – Turns LED ON/OFF instantly
10K Potentiometer – Controls LED brightness & Red LED – Output device controlled wirelessly.
2x LoRa SX1278 Modules – Wireless communication between transmitter and receiver

Arduino Code
Transmitter Code (LoRa Sender)
#include <SPI.h>
#include <LoRa.h>
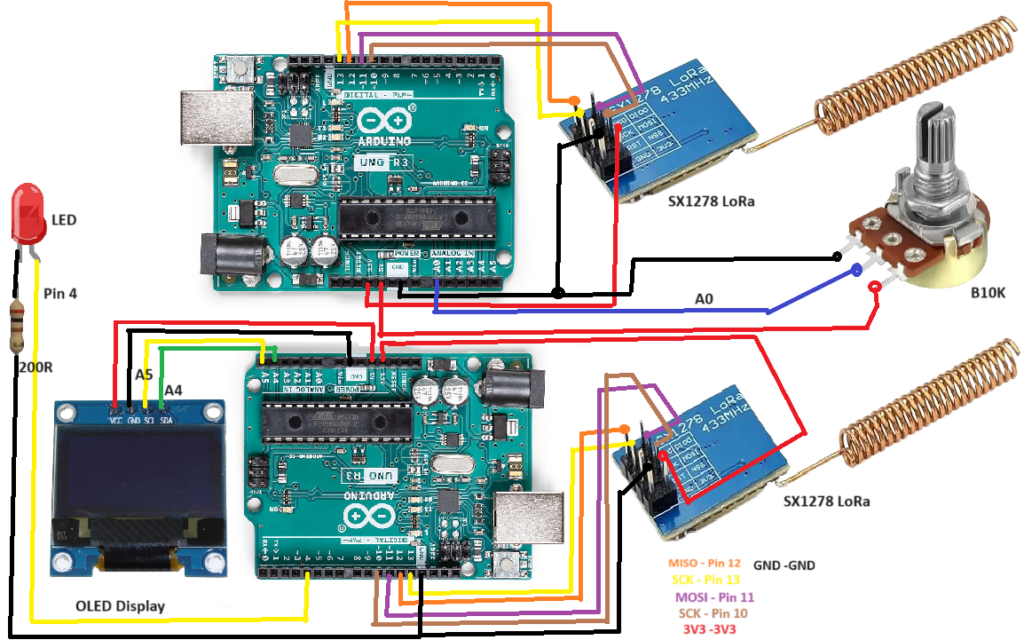
int pot = A0; // Analog pin for the potentiometer
int buttonPin = 4; // Define the pin for the pushbutton
bool buttonState = false; // State of the pushbutton
void setup() {
Serial.begin(9600);
pinMode(pot, INPUT);
pinMode(buttonPin, INPUT_PULLUP); // Initialize pushbutton pin as input with pull-up resistor
while (!Serial);
Serial.println("LoRa Sender");
if (!LoRa.begin(433E6)) { // or 915E6, the MHz speed of your module
Serial.println("Starting LoRa failed!");
while (1);
}
}
void loop() {
int potValue = analogRead(pot); // Read the potentiometer value
buttonState = (digitalRead(buttonPin) == LOW); // Read the pushbutton state
// Format the data as "potValue,buttonState"
String dataToSend = String(potValue) + "," + String(buttonState);
Serial.print("Sending Data: ");
Serial.println(dataToSend);
// Start LoRa packet
LoRa.beginPacket();
LoRa.print(dataToSend);
LoRa.endPacket();
delay(50); // Adjust delay as needed
}
Receiver Code (LoRa Receiver)
#include <SPI.h>
#include <LoRa.h>
#include <Adafruit_GFX.h>
#include <Adafruit_SSD1306.h>
#include <Wire.h>

#define SCREEN_WIDTH 128
#define SCREEN_HEIGHT 64
#define OLED_RESET -1
Adafruit_SSD1306 display(SCREEN_WIDTH, SCREEN_HEIGHT);

int LED = 3;
String inString = "";
int potValue = 0;
int pwmValue = 0;
bool ledState = false;

void setup() {
  Serial.begin(9600);
  pinMode(LED, OUTPUT);

  if (!display.begin(SSD1306_SWITCHCAPVCC, 0x3C)) {
    Serial.println(F("SSD1306 allocation failed"));
    for (;;);
  }

  display.display();
  delay(2000);
  display.clearDisplay();

  while (!Serial);
  Serial.println("LoRa Receiver");

  if (!LoRa.begin(433E6)) {
    Serial.println("Starting LoRa failed!");
    while (1);
  }
}

void loop() {
  int packetSize = LoRa.parsePacket();
  if (packetSize) {
    while (LoRa.available()) {
      inString += (char)LoRa.read();
    }

    int commaIndex = inString.indexOf(',');
    if (commaIndex != -1) {
      String potString = inString.substring(0, commaIndex);
      String buttonString = inString.substring(commaIndex + 1);

      potValue = potString.toInt();
      bool buttonState = (buttonString == "1");

      if (buttonState) {
        pwmValue = 255;
      } else {
        pwmValue = map(potValue, 0, 1023, 0, 255);
      }

      ledState = (pwmValue > 0 || buttonState);

      inString = "";

      display.clearDisplay();
      display.setTextSize(2);
      display.setTextColor(SSD1306_WHITE);
      display.setCursor(0, 0);
      display.print("PWM: ");
      display.println(pwmValue);
      display.setCursor(0, 30);
      display.print("State: ");
      display.println(ledState ? "ON" : "OFF");
      display.display();
    }
  }

  if (ledState) {
    analogWrite(LED, pwmValue);
  } else {
    digitalWrite(LED, LOW);
  }
}
Schematic
LED Control Using Pushbutton
When the pushbutton is pressed:
- The transmitter sends a signal via LoRa
- The receiver turns the LED fully ON (PWM = 255)
- OLED displays: State: ON
LED Brightness Control Using Potentiometer
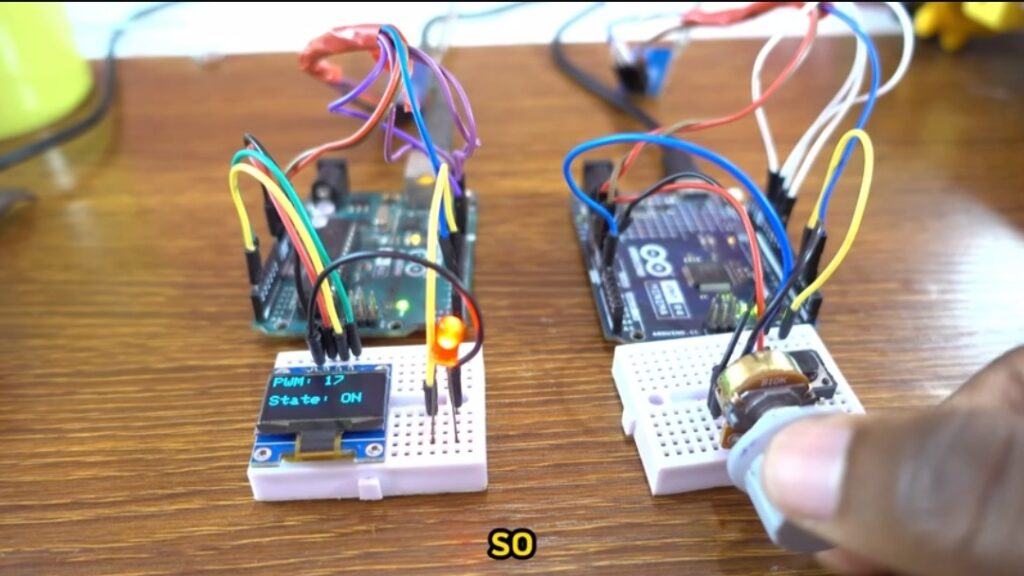
When adjusting the potentiometer:
- Analog values (0–1023) are sent wirelessly
- The receiver maps them to PWM (0–255)
- LED brightness changes smoothly
- OLED displays real-time PWM value
Conclusion & Applications
This project shows how LoRa technology can be used to create a long-range wireless control system with Arduino. By combining analog and digital inputs, you can control both the state and brightness of an LED remotely.
Applications:
- Smart home lighting control
- Wireless automation systems
- Industrial remote control
- IoT-based lighting systems
- Long-range monitoring and control projects
This system is scalable and can be expanded to control multiple devices over long distances, making it a powerful solution for modern embedded and IoT applications.