Autres Cours
Control LED Brightness with XIAO RP2040 & OLED Display | Push Button Tutorial
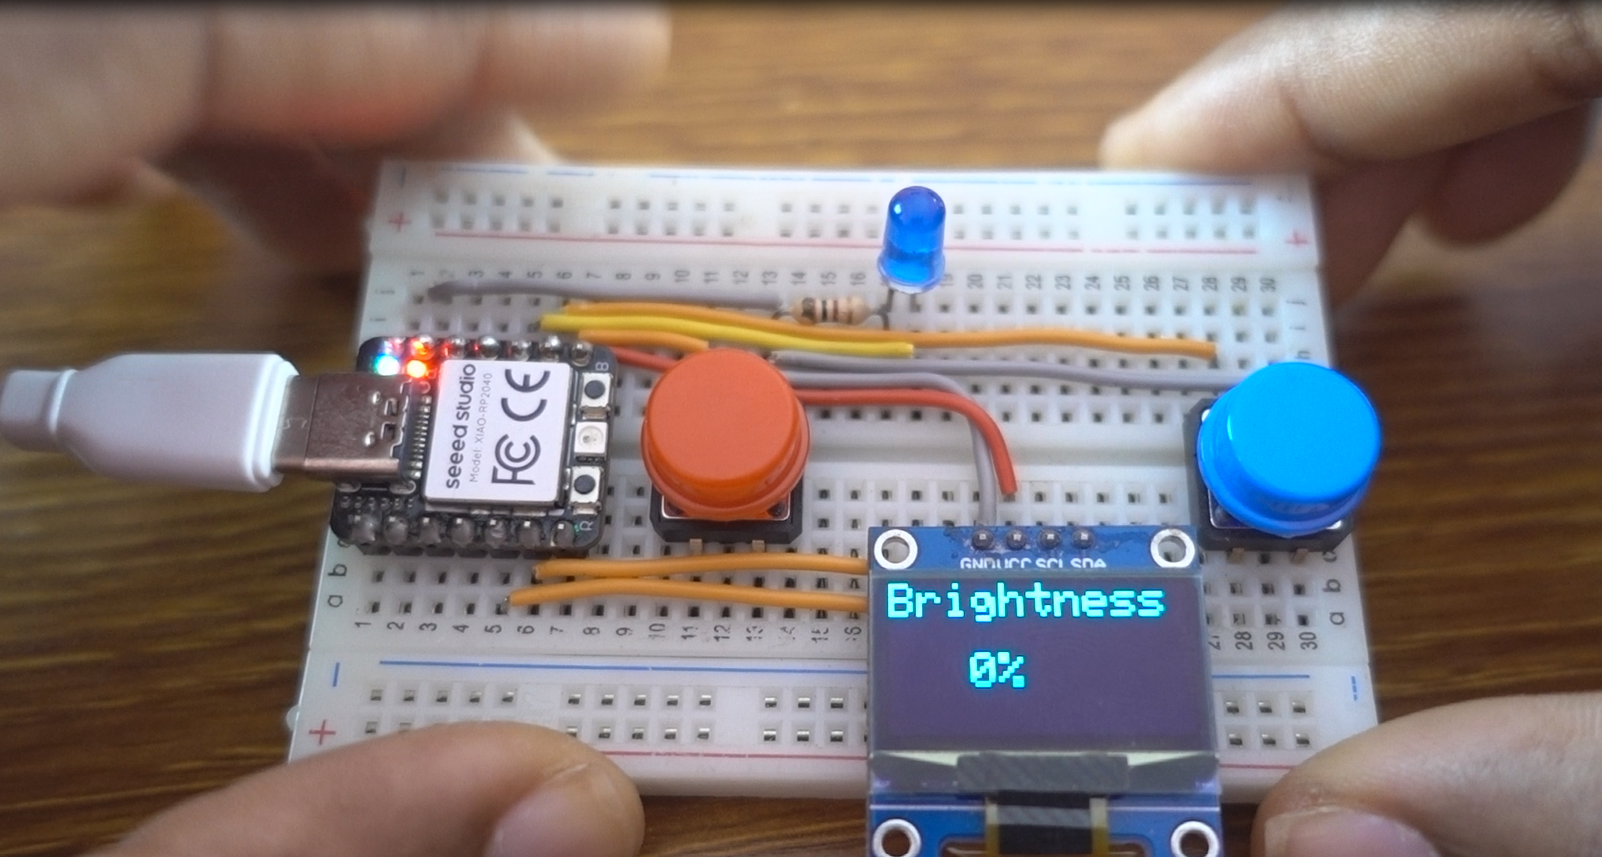
In this project, you will learn how to control the brightness of an LED using two push buttons and display the brightness level as a percentage on an OLED display. We will use the XIAO RP2040 microcontroller, which is compact but powerful, making it perfect for projects like this. The LED brightness will be adjusted incrementally with one button to increase and another to decrease, providing real-time feedback on the OLED display.
This tutorial is ideal for anyone looking to practice using OLED displays, PWM (Pulse Width Modulation) for LED control, and handling user inputs like push buttons with debouncing logic.
Components Used
XIAO RP2040

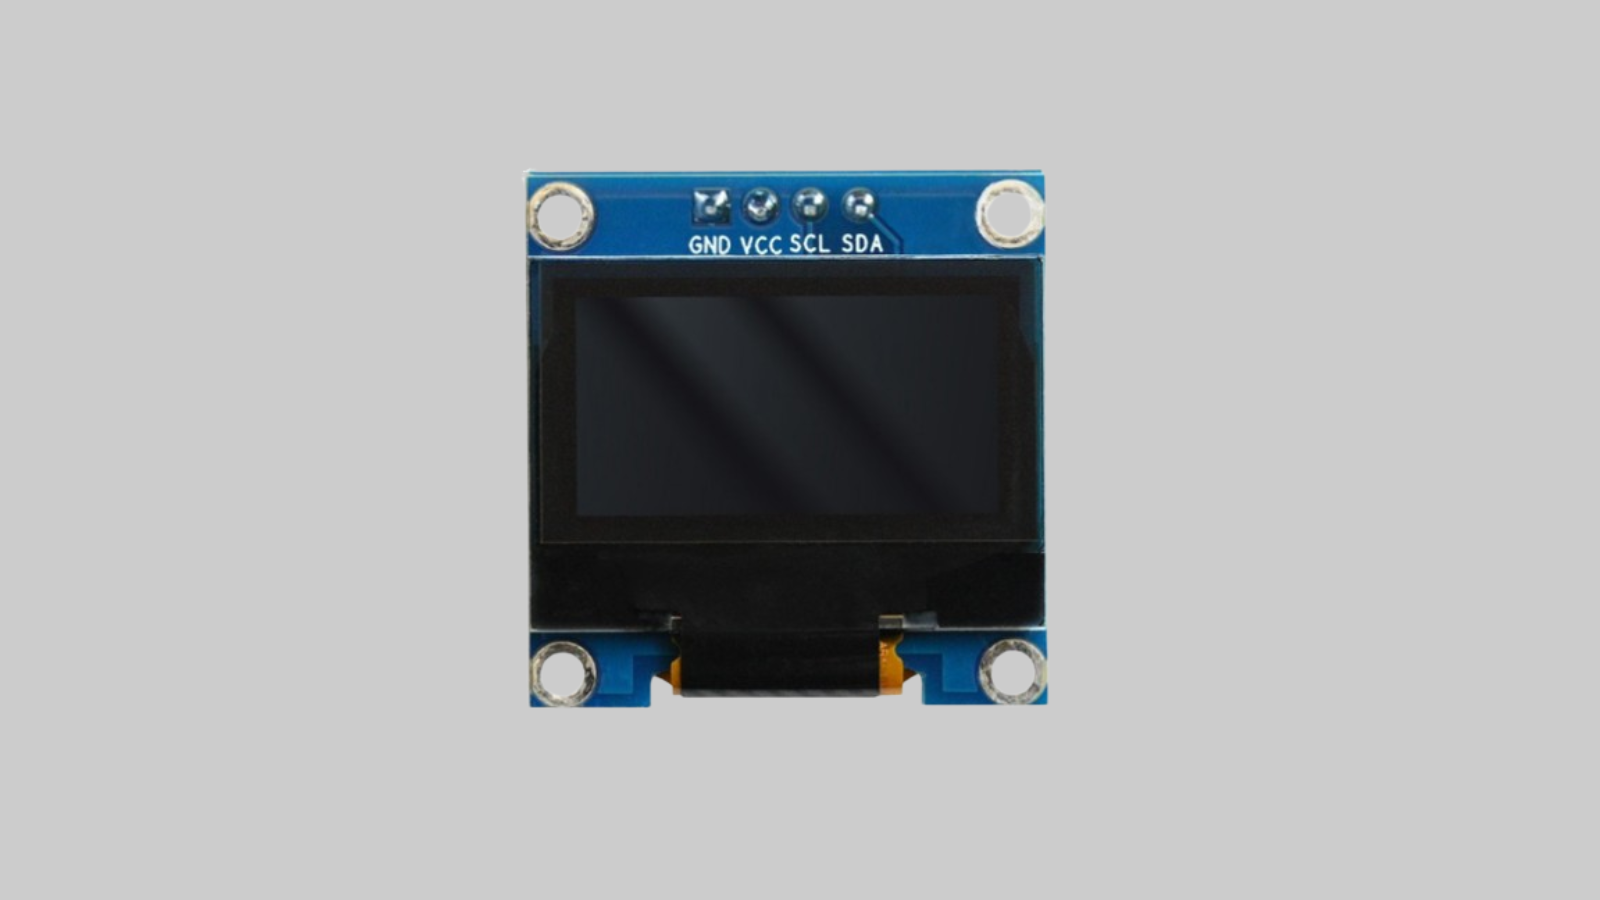
OLED Display (I2C)
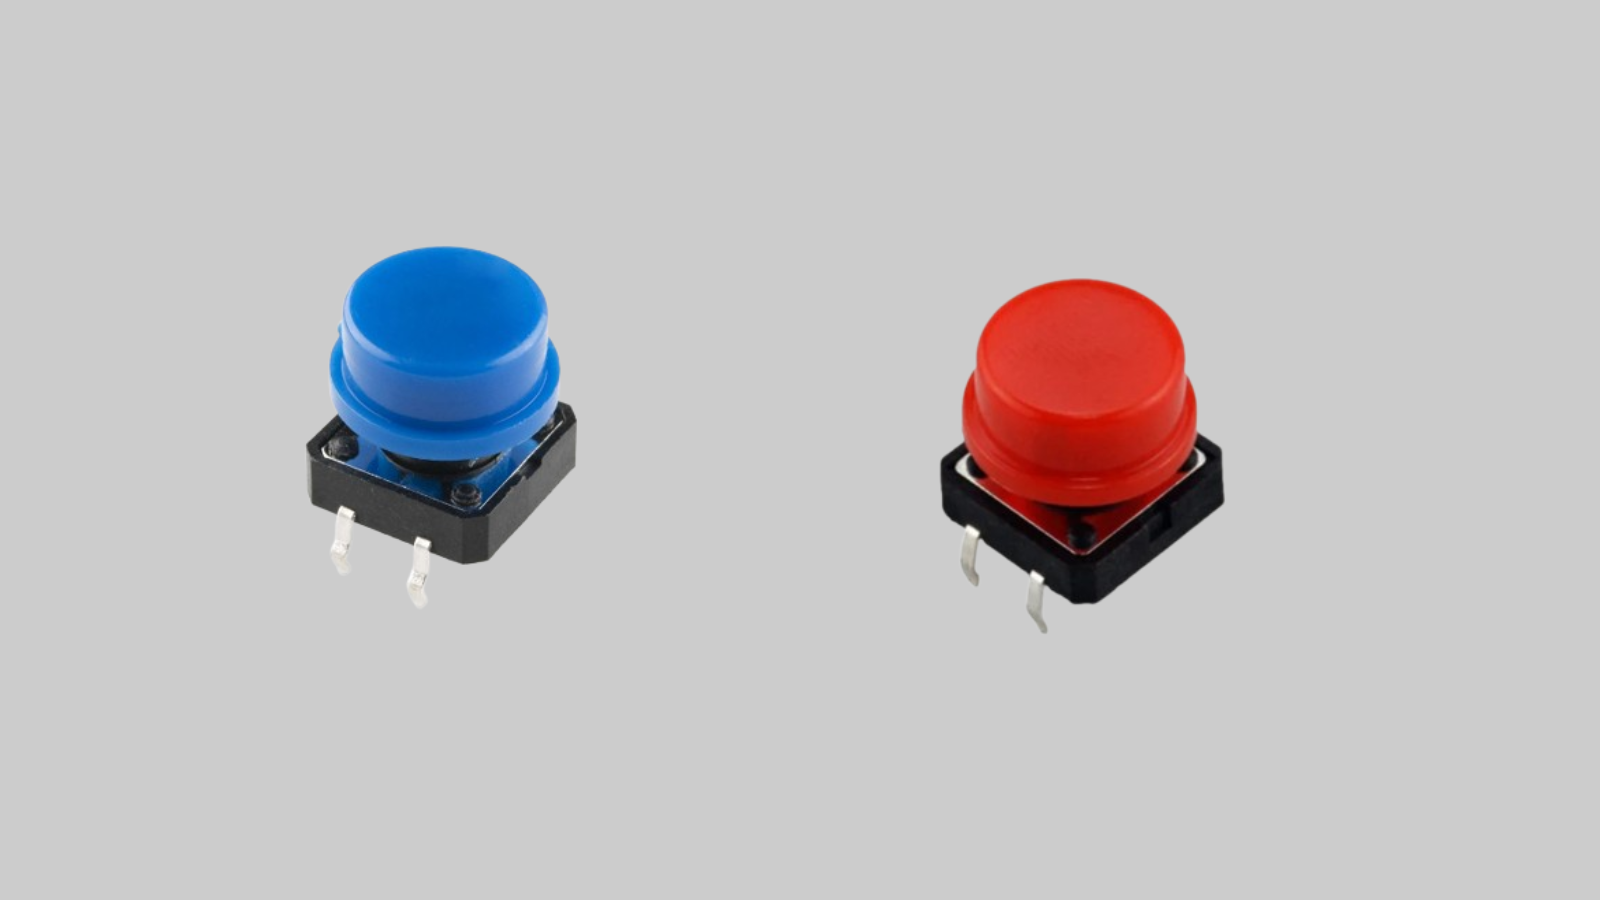
Red Push Button & Blue Push Button
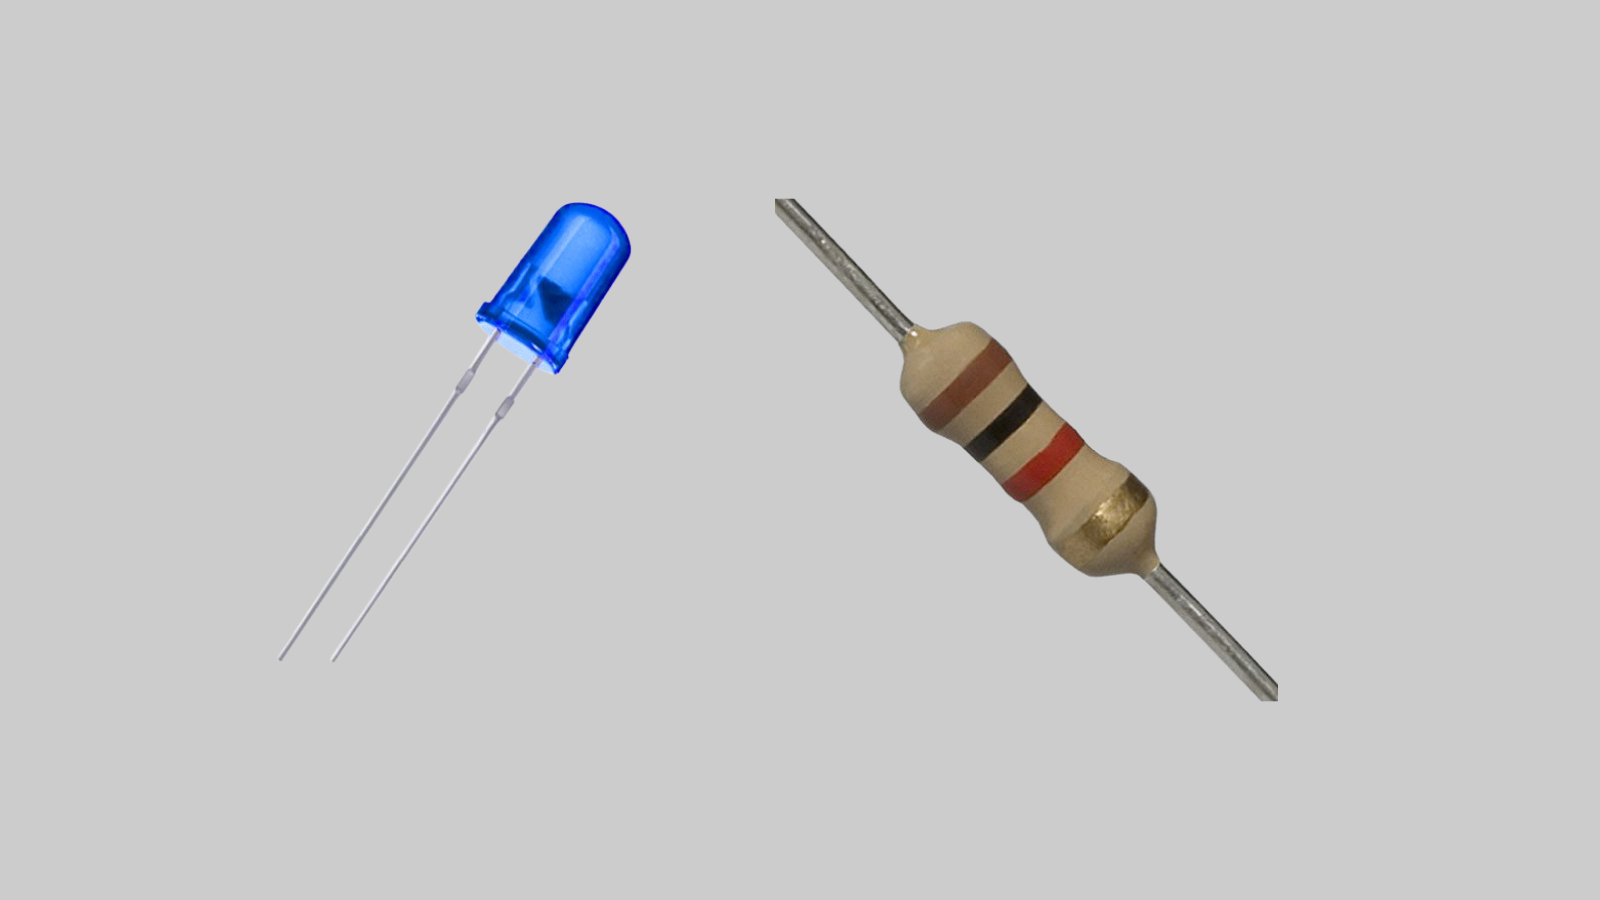
100 Ohm Resistor and Blue LED
XIAO RP2040 Overview
The Seeed Studio XIAO RP2040 is a compact yet powerful development board featuring a dual-core RP2040 processor, capable of operating at up to 133 MHz. This board, measuring just 21x17.8mm, includes 264KB of SRAM and 2MB of onboard flash, which offers substantial storage and processing capacity. It supports various interfaces including I2C, UART, SPI, and includes 14 GPIO pins, making it ideal for a wide variety of compact projects.
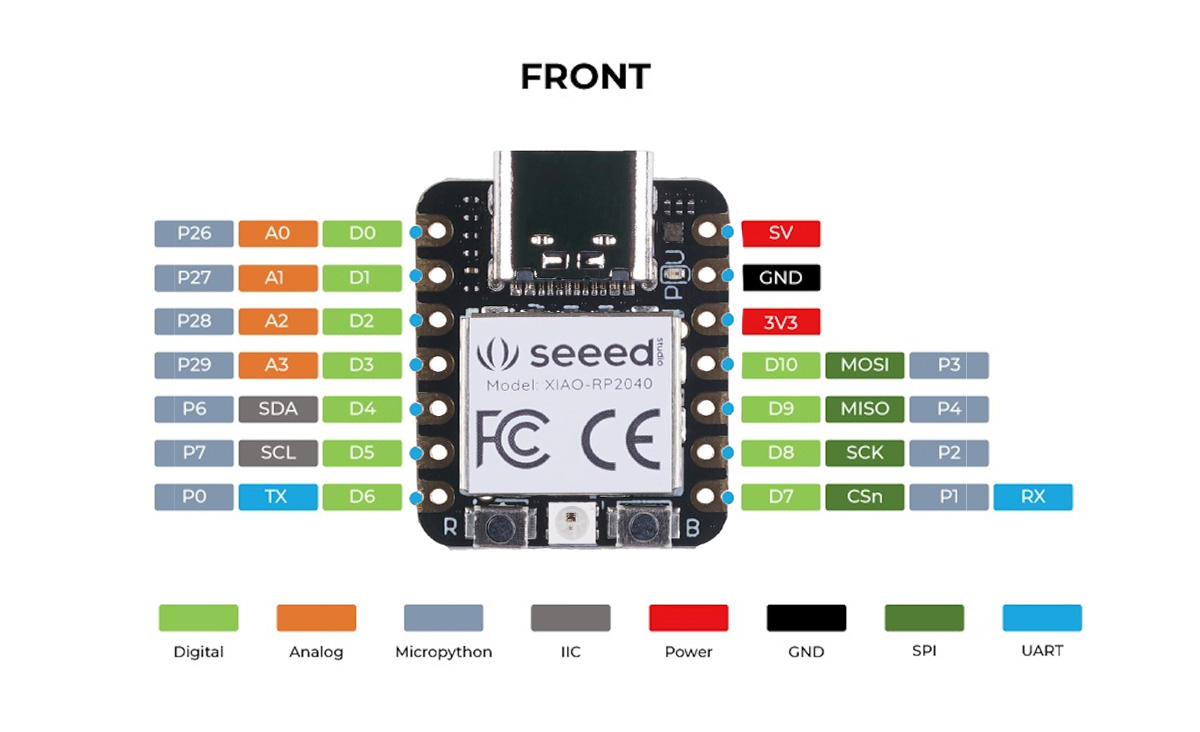
Pinout of XIAO RP2040
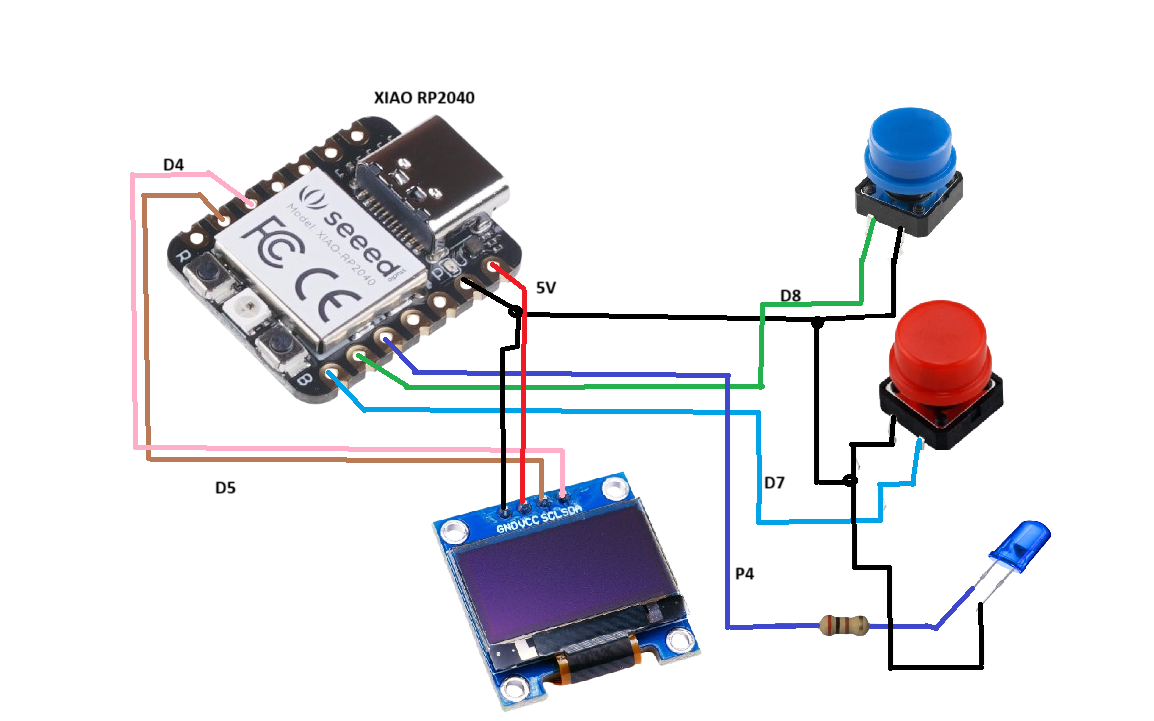
Circuit Connections
OLED Display (I2C)
- SDA → XIAO RP2040 SDA
- SCL → XIAO RP2040 SCL
- Vcc → XIAO RP2040 5V
- GND → XIAO RP2040 GND
- Red Push Button → XIAO RP2040 Pin D7
- Blue Push Button → XIAO RP2040 Pin D8
- LED (with 100-ohm resistor) → XIAO RP2040 Pin D9
Schematic
Code Breakdown
Code Overview
The code controls the brightness of an LED using two push buttons. The brightness level is displayed on an OLED screen. The red button increases the brightness, and the blue button decreases it. The OLED shows the current brightness percentage.
Code Explanation
#include <Wire.h>
#include <Adafruit_GFX.h>
#include <Adafruit_SSD1306.h>

const int buttonPin1 = D7;  // Push button 1 (Red)
const int buttonPin2 = D8;  // Push button 2 (Blue)
int brightness = 0;         // Initial brightness level
const int ledPin = 4;       // LED pin for PWM control

unsigned long previousMillis1 = 0;  // Last time button 1 was pressed
unsigned long previousMillis2 = 0;  // Last time button 2 was pressed
const long debounceDelay = 200;     // Debounce delay for button presses

// OLED display dimensions
#define SCREEN_WIDTH 128
#define SCREEN_HEIGHT 64

Adafruit_SSD1306 display(SCREEN_WIDTH, SCREEN_HEIGHT);
Libraries: We include Wire.h, Adafruit_GFX.h, and Adafruit_SSD1306.h to manage the OLED display and I2C communication.
Pin Definitions: Button pins (D7, D8) are for push buttons. The LED is connected to pin 4, a PWM-enabled pin.
Debouncing: We set a debounce delay (200 ms) to avoid multiple triggers when a button is pressed.
void setup() {
  pinMode(buttonPin1, INPUT_PULLUP);  // Set button pins as inputs
  pinMode(buttonPin2, INPUT_PULLUP);
  pinMode(ledPin, OUTPUT);            // Set LED pin as output

  Serial.begin(9600);                 // Initialize serial communication

  // Initialize OLED display with I2C address 0x3C
  if (!display.begin(SSD1306_SWITCHCAPVCC, 0x3C)) {
    Serial.println(F("SSD1306 allocation failed"));
    for (;;); // Infinite loop if OLED fails
  }

  display.clearDisplay();              // Clear the display at startup
  display.setTextSize(1);              // Set text size
  display.setTextColor(SSD1306_WHITE); // White text
  display.setCursor(0, 0);             // Start at top-left corner
  display.display();                   // Display the initial setup
}
Pin Modes: Push buttons are set up as input with pull-up resistors. The LED pin is set as an output.
OLED Initialization: If the OLED display doesn't initialize, the program will stop, showing an error message.
Display Setup: The OLED is cleared, and text settings are prepared for updates.
void loop() {
  unsigned long currentMillis = millis();  // Get the current time

  // Increase brightness when the red button is pressed
  if (currentMillis - previousMillis1 >= debounceDelay) {
    if (digitalRead(buttonPin1) == LOW) {
      previousMillis1 = currentMillis;    // Update last press time
      brightness += 15;                   // Increase brightness
      if (brightness > 255) brightness = 255;  // Cap brightness at 255
      analogWrite(ledPin, brightness);    // Apply brightness to LED
      updateOLED(brightness);             // Update OLED with brightness
    }
  }

  // Decrease brightness when the blue button is pressed
  if (currentMillis - previousMillis2 >= debounceDelay) {
    if (digitalRead(buttonPin2) == LOW) {
      previousMillis2 = currentMillis;    // Update last press time
      brightness -= 15;                   // Decrease brightness
      if (brightness < 0) brightness = 0;  // Cap brightness at 0
      analogWrite(ledPin, brightness);    // Apply brightness to LED
      updateOLED(brightness);             // Update OLED with brightness
    }
  }
}
Button Actions: Each button press increases or decreases the LED brightness in steps of 15. The OLED is updated after each change.
Debouncing: We check that the debounce delay has passed before registering a button press.
// Function to update OLED display with brightness percentage
void updateOLED(int brightnessValue) {
  display.clearDisplay();  // Clear OLED display
  display.setCursor(0, 0); // Set cursor to top-left
  display.setTextSize(2);  // Increase text size
  display.print("Brightness ");

  // Convert brightness (0-255) to percentage
  int brightnessPercentage = map(brightnessValue, 0, 255, 0, 100);
  display.setCursor(35, 30); // Position text
  display.print(brightnessPercentage);
  display.print("%");

  display.display();  // Output text to the display
}
OLED Update Function: This function clears the display and shows the current brightness as a percentage. The percentage is calculated by mapping the brightness (0-255) to a 0-100% scale.
Full Code
#include <Wire.h>
#include <Adafruit_GFX.h>
#include <Adafruit_SSD1306.h>

const int buttonPin1 = D7;
const int buttonPin2 = D8;
int brightness = 0;
const int ledPin = 4;

unsigned long previousMillis1 = 0;
unsigned long previousMillis2 = 0;
const long debounceDelay = 200;

#define SCREEN_WIDTH 128
#define SCREEN_HEIGHT 64
Adafruit_SSD1306 display(SCREEN_WIDTH, SCREEN_HEIGHT);

void setup() {
  pinMode(buttonPin1, INPUT_PULLUP);
  pinMode(buttonPin2, INPUT_PULLUP);
  pinMode(ledPin, OUTPUT);

  Serial.begin(9600);

  if (!display.begin(SSD1306_SWITCHCAPVCC, 0x3C)) {
    Serial.println(F("SSD1306 allocation failed"));
    for (;;);
  }

  display.clearDisplay();
  display.setTextSize(1);
  display.setTextColor(SSD1306_WHITE);
  display.setCursor(0, 0);
  display.display();
}

void loop() {
  unsigned long currentMillis = millis();

  if (currentMillis - previousMillis1 >= debounceDelay) {
    if (digitalRead(buttonPin1) == LOW) {
      previousMillis1 = currentMillis;
      brightness += 15;
      if (brightness > 255) brightness = 255;
      analogWrite(ledPin, brightness);
      updateOLED(brightness);
    }
  }

  if (currentMillis - previousMillis2 >= debounceDelay) {
    if (digitalRead(buttonPin2) == LOW) {
      previousMillis2 = currentMillis;
      brightness -= 15;
      if (brightness < 0) brightness = 0;
      analogWrite(ledPin, brightness);
      updateOLED(brightness);
    }
  }
}

void updateOLED(int brightnessValue) {
  display.clearDisplay();
  display.setCursor(0, 0);
  display.setTextSize(2);
  display.print("Brightness ");

  int brightnessPercentage = map(brightnessValue, 0, 255, 0, 100);
  display.setCursor(35, 30);
  display.print(brightnessPercentage);
  display.print("%");

  display.display();
}
How the Project Works
In this project, two push buttons control the brightness of an LED. The red push button increases the brightness, while the blue one decreases it. The current brightness is shown as a percentage on an OLED display.
Produits Recommandés
 Mastering Electronics Projects