ESP8266 Smoke Alarm Project: Detect Smoke and Play Audio Warnings

In this course, you will learn how to create a smoke detection system using the ESP8266, the MQ-135 gas sensor, and the DFPlayer Mini audio module. When smoke is detected, the system triggers an audio alert through the DFPlayer Mini, playing a sound to warn users of the danger.
Watch the full video here:
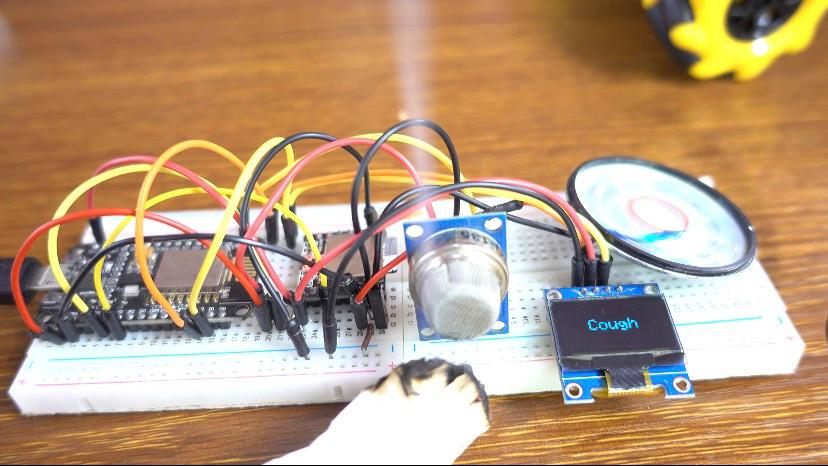
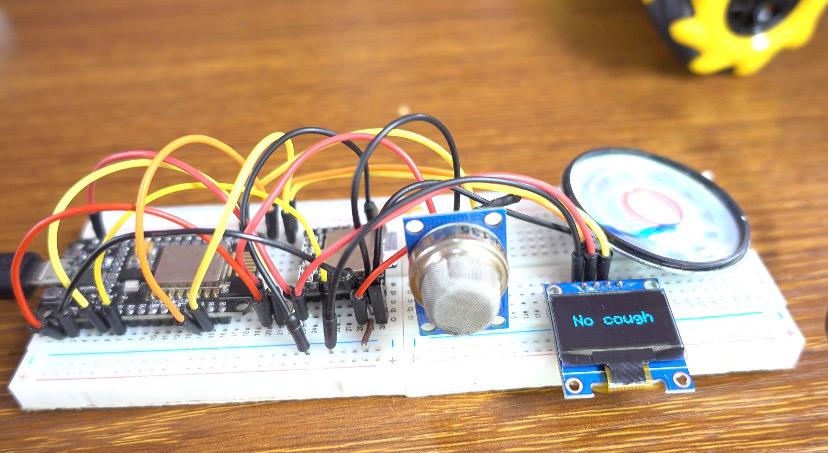
We will use an OLED display to show the real-time status, and a speaker to play an audio file indicating smoke detection. This project is great for adding a layer of security and alertness to homes or small projects, demonstrating how sensors and audio feedback can work together
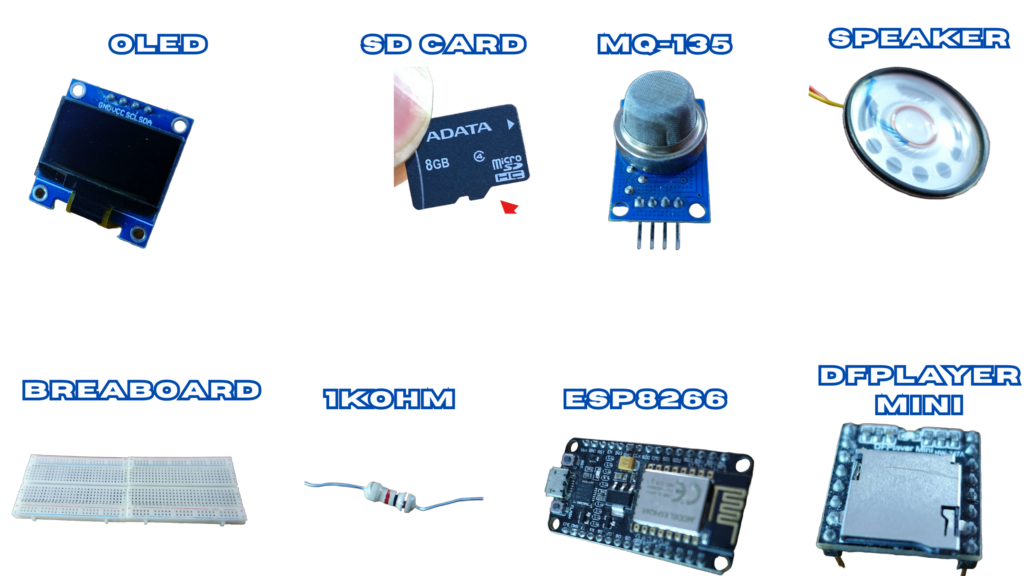
Components Used
- ESP8266
- MQ-135
- OLED Display
- DFPlayer Mini
- 1K Ohm Resistor
- 20 Ohm 1 Watt Speaker
- Breadboard
- 1GB SD Card
MQ-135 Sensor
The MQ-135 is a gas sensor that detects gases such as ammonia, nitrogen oxides, benzene, and smoke. It has 4 pins:
- AD →(Analog Data Output)
- D0 →(Digital Data Output)
- GND →(Ground)
- Vcc →(Power Supply)
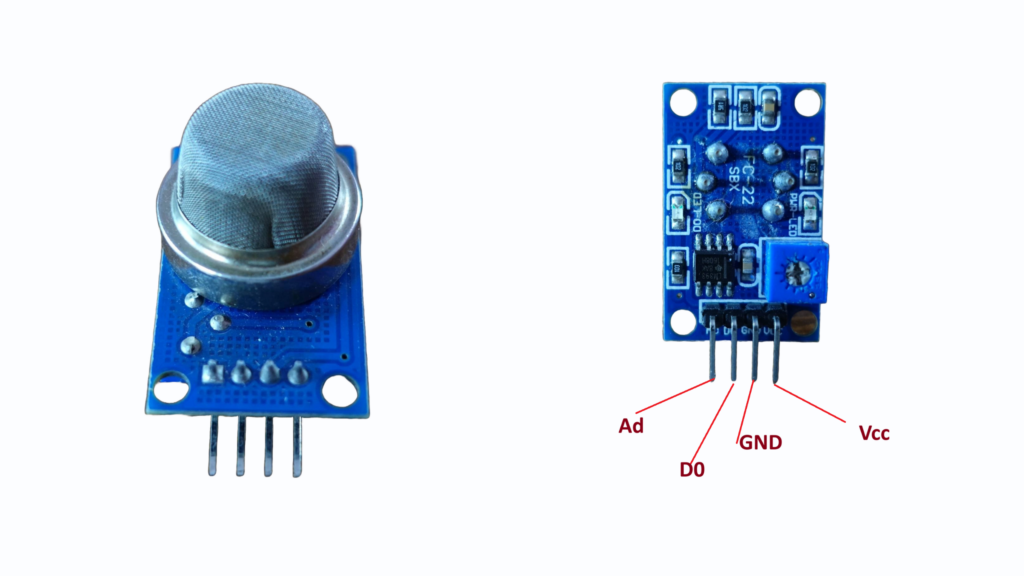
The sensor also comes with a 10K Ohm potentiometer to adjust its sensitivity, and an IC LM393 comparator to convert analog signals into digital outputs.
DFPlayer Mini
MP3, WAV, and WMA are among the formats supported by the DFPlayer Mini, a small audio player module. It can be connected directly to a speaker thanks to its simplified output. The module has an SD card adapter that supports FAT16 or FAT32 cards up to 32GB in size. The module uses the UART protocol to communicate with the microcontroller and is powered by a 3.2V or 5V DC supply.

Preliminary Steps
Before getting started with the DFPlayer Mini module, there are a few important preparations to consider.
SD Card & MP3 File
An MP3 file that will play when gas is detected and an SD card with a maximum capacity of 32 GB are required.
How to Copy Audio Files to the SD Card
Format the SD Card: Verify that FAT16 or FAT32 is being used to format your micro SD card. Organize Folders: Use numbers like 01, 02, 03, and so on to rename common folders.
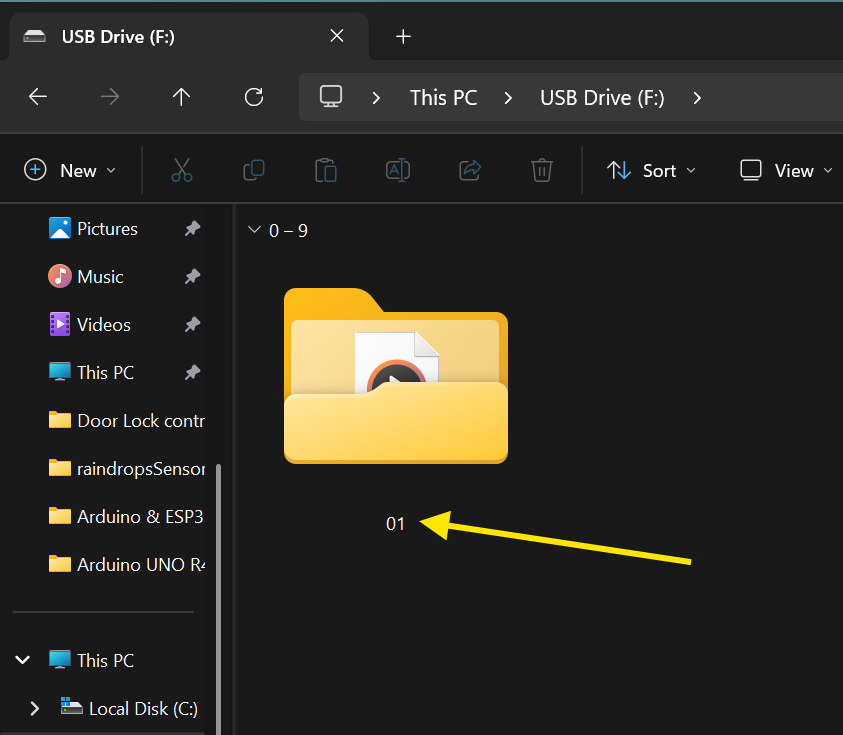
Rename Audio Files: These folders’ audio files should be renamed as 001.mp3, 002.mp3, 003.mp3, and so on, up to 255.mp3. WAV format (001.wav, 002.wav, etc.) is another option.
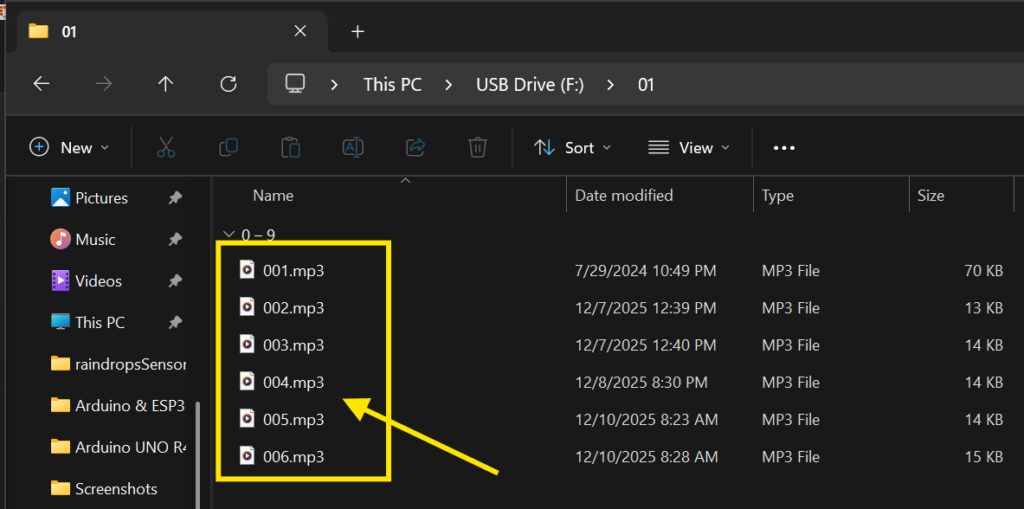
Optional File Naming: You can add the number prefix while maintaining the original file name. For instance, rename the file “Yesterday Once More.mp3” to 001Yesterday Once More.mp3.
I used TTSMaker to create my audio files for this project. I’ve included the audio file used for this project below.
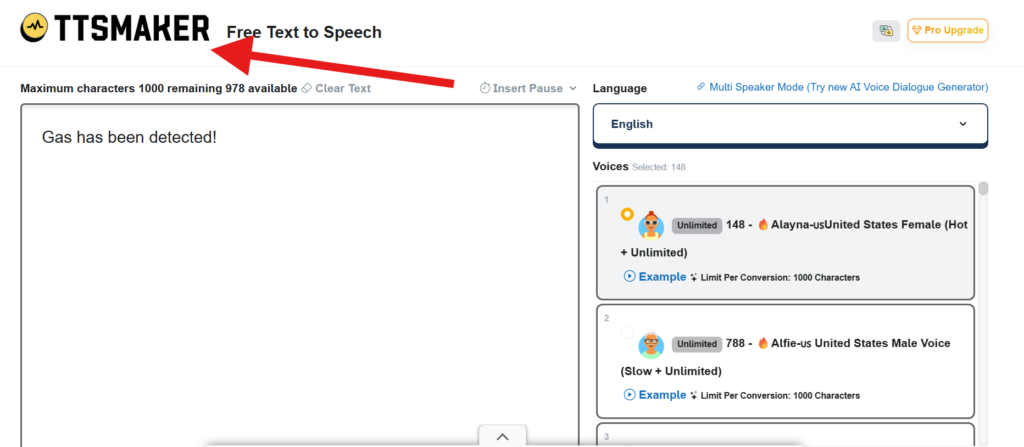
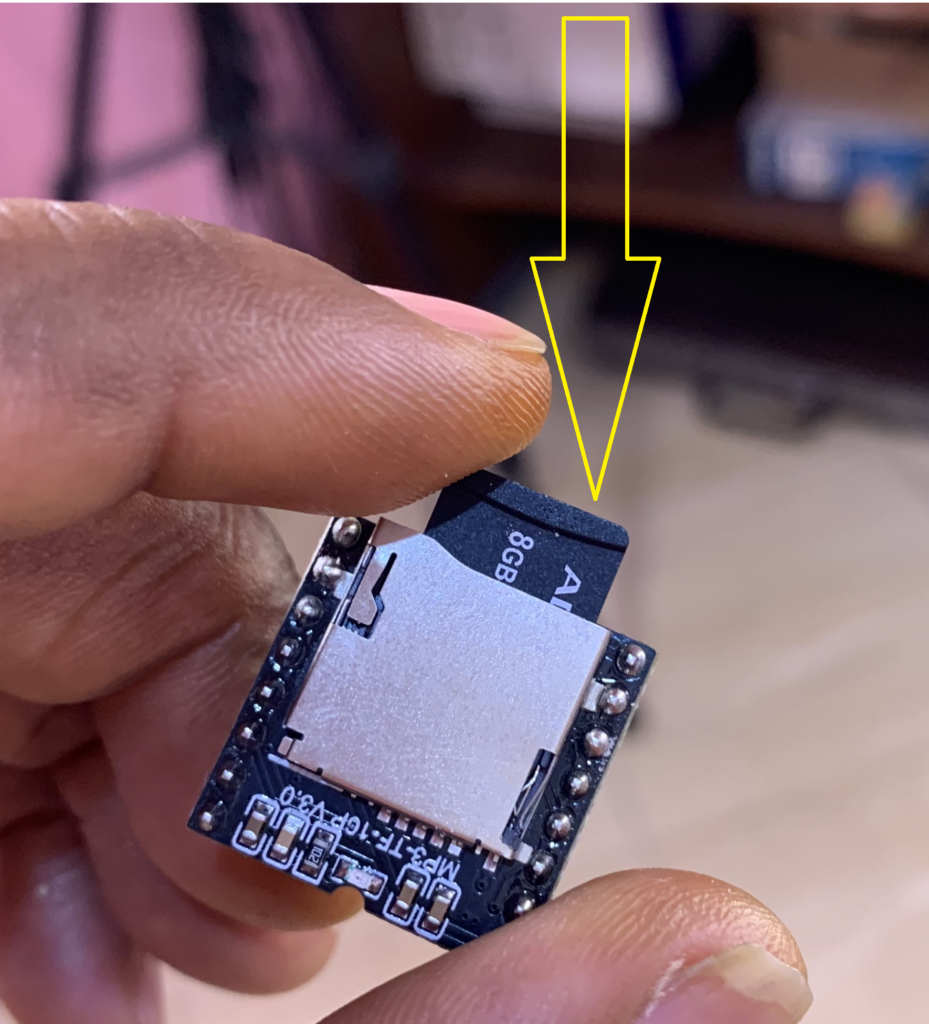
Remember to insert the SD card into the DFPlayer Mini after using TTSMaker to create the audio files and copying them to the card.
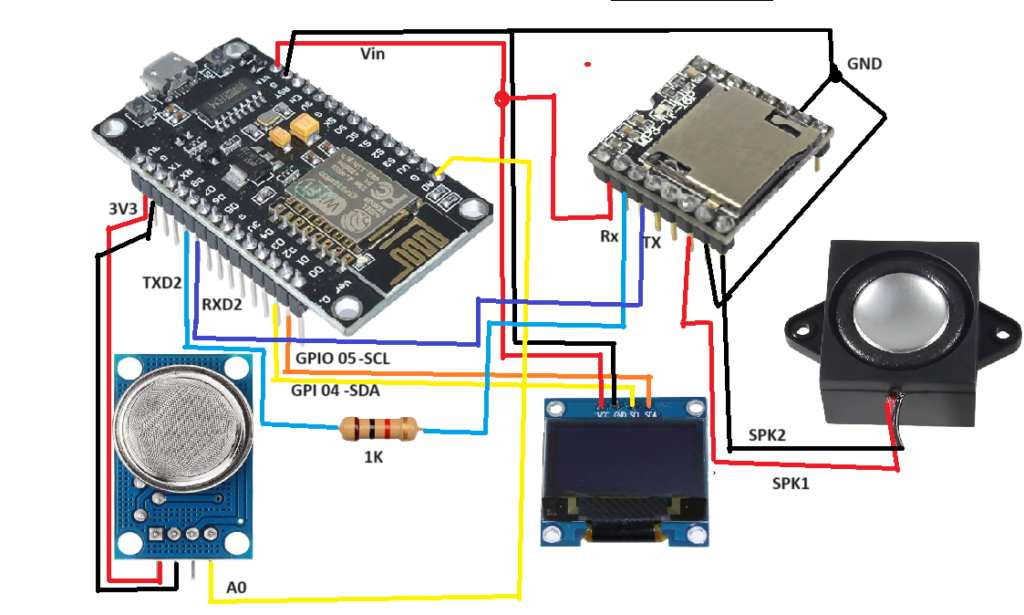
Circuit Diagram
Code
#include <Adafruit_GFX.h>
#include <Adafruit_SSD1306.h>
#include "SoftwareSerial.h"
#include "DFRobotDFPlayerMini.h"

#define SCREEN_WIDTH 128
#define SCREEN_HEIGHT 64
#define OLED_RESET -1
Adafruit_SSD1306 display(SCREEN_WIDTH, SCREEN_HEIGHT);

#define analogPin A0

SoftwareSerial mySoftwareSerial(13, 15);
DFRobotDFPlayerMini myDFPlayer;

unsigned long previousMillis = 0;
const long interval = 3100;
bool isPlaying = false;

void setup() {
  mySoftwareSerial.begin(9600);
  Serial.begin(115200);

  if (!myDFPlayer.begin(mySoftwareSerial)) {
    Serial.println(F("Not initialized:"));
    while (true);
  }

  myDFPlayer.volume(60);
  myDFPlayer.EQ(0);

  if (!display.begin(SSD1306_SWITCHCAPVCC, 0x3C)) {
    while (true);
  }

  display.clearDisplay();
  display.setTextSize(2);
  display.setTextColor(SSD1306_WHITE);
  display.println(F("Initializing..."));
  display.display();
  delay(2000);
}

void loop() {
  unsigned long currentMillis = millis();
  int sensorValue = analogRead(A0);

  display.clearDisplay();
  display.setTextSize(2);

  if (sensorValue > 500) {
    display.setCursor(30, 20);
    display.println(F("Cough"));

    if (!isPlaying) {
      myDFPlayer.play(1);
      isPlaying = true;
      previousMillis = currentMillis;
    }
  } else {
    display.setCursor(30, 20);
    display.println(F("No cough"));
    isPlaying = false;
  }

  if (isPlaying && currentMillis - previousMillis >= interval) {
    isPlaying = false;
  }

  display.display();
  delay(100);
}
How the project works
This part of the code initializes the OLED display and the DFPlayer Mini module.
When the system starts, it sets the audio volume and prepares the screen.
An “Initializing…” message is shown to confirm that all modules are working.
If a module fails, the system stops to avoid incorrect behavior.
The ESP8266 continuously reads the analog value from the MQ-135 sensor.
If the value exceeds 500, the system detects a cough/smoke event.
The OLED displays “Cough” and the DFPlayer Mini plays an alert sound once.
A timer prevents the audio from looping continuously.