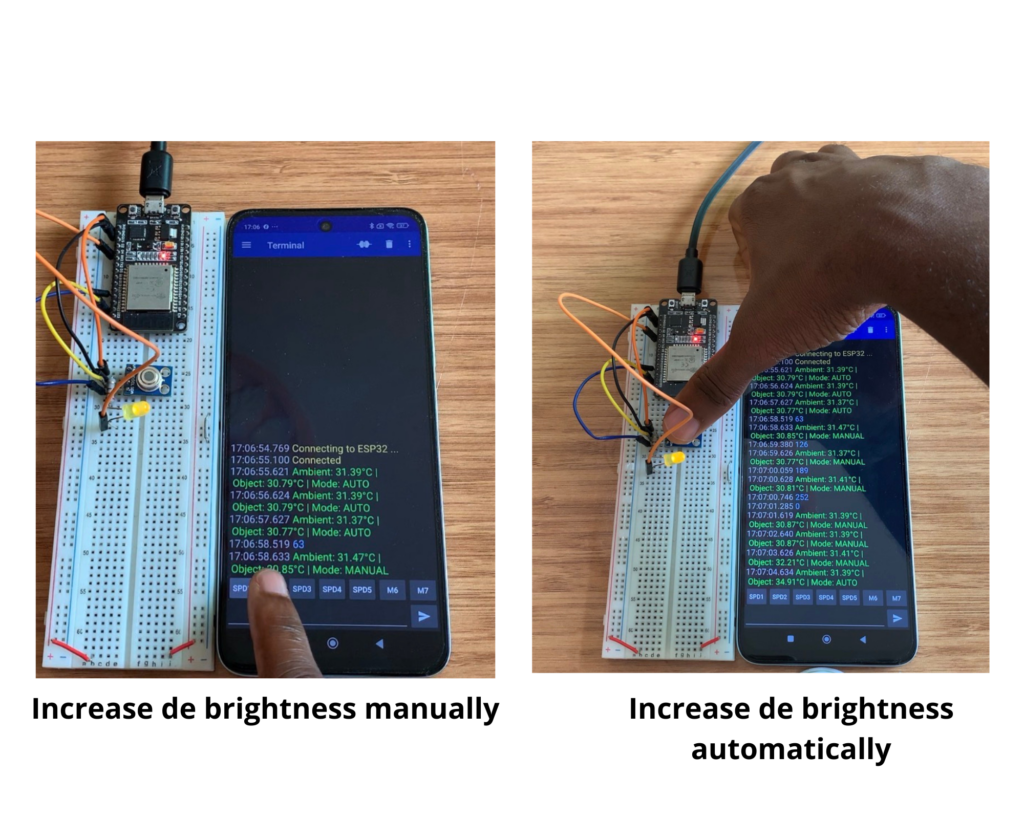

Non-Contact IR Temperature Monitoring & Remote LED Control via ESP32 & Bluetooth
Do you need to manage an output indicator while wirelessly monitoring the temperature without making physical contact? When used with an ESP32, the MLX90614 Infrared (IR) Thermometer makes Bluetooth-controlled LED brightness and non-contact temperature transmission simple and dependable.
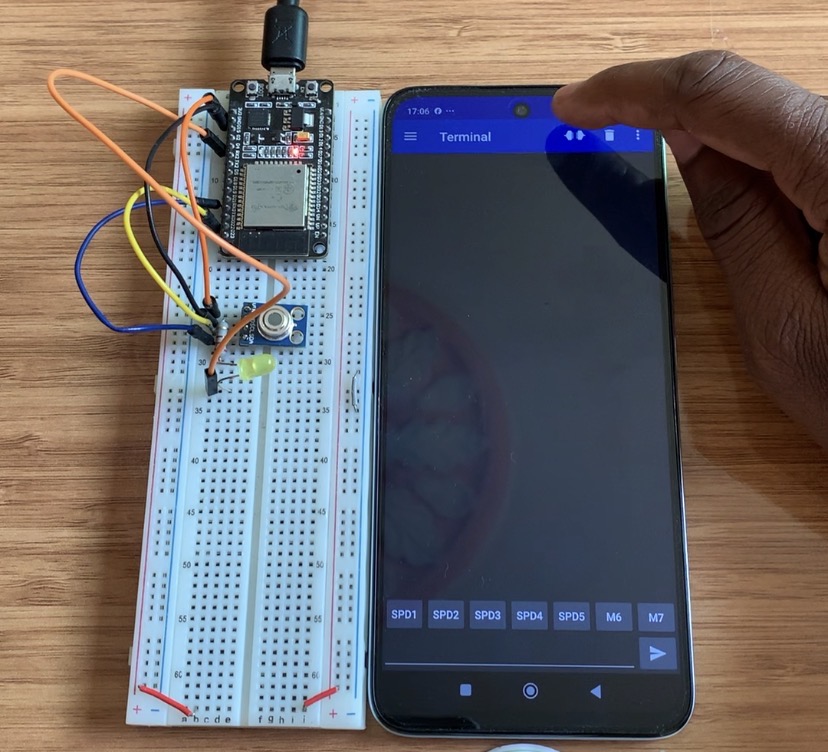
Components Needed
- ESP32 Development Board
- MLX90614 Contactless IR Temperature Sensor (GY-906 module)
- Standard 5mm LED (connected to GPIO 4 for PWM control)
- 100Ω Resistor (current limiter for the LED)
- Breadboard and Jumper Wires
- USB Cable / 5V Power Source
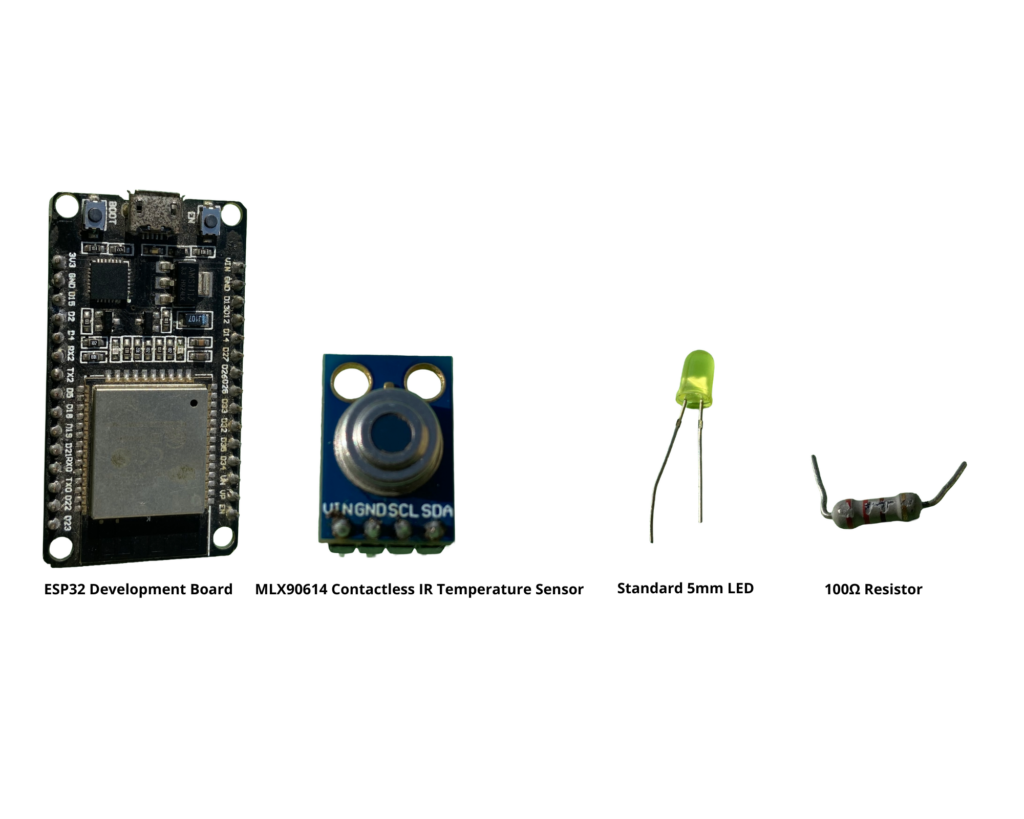
Where to Find Components
You can easily source all these electronic parts at affordable prices online:
MLX90614 Sensor
A high-precision non-contact infrared thermometer, the MLX90614 is intended for non-invasive item surface and ambient temperature readings. It transmits ambient (the surrounding air) and object temperatures back to the microcontroller via I2C connection.
Pinout
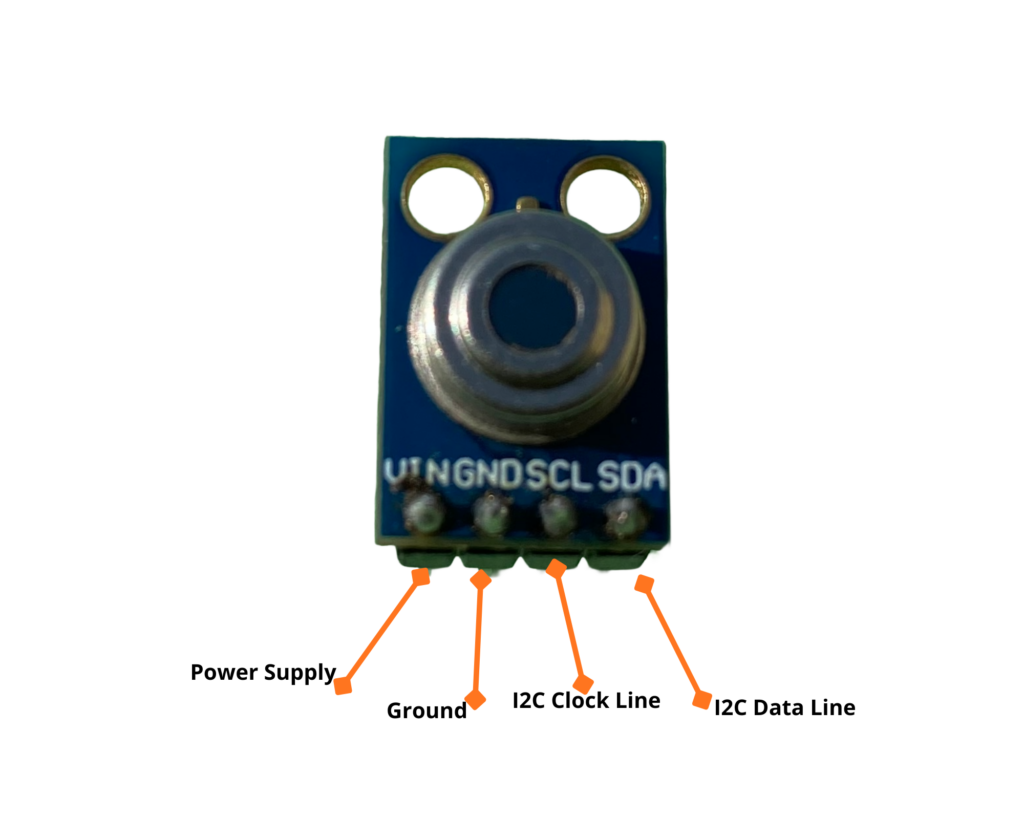
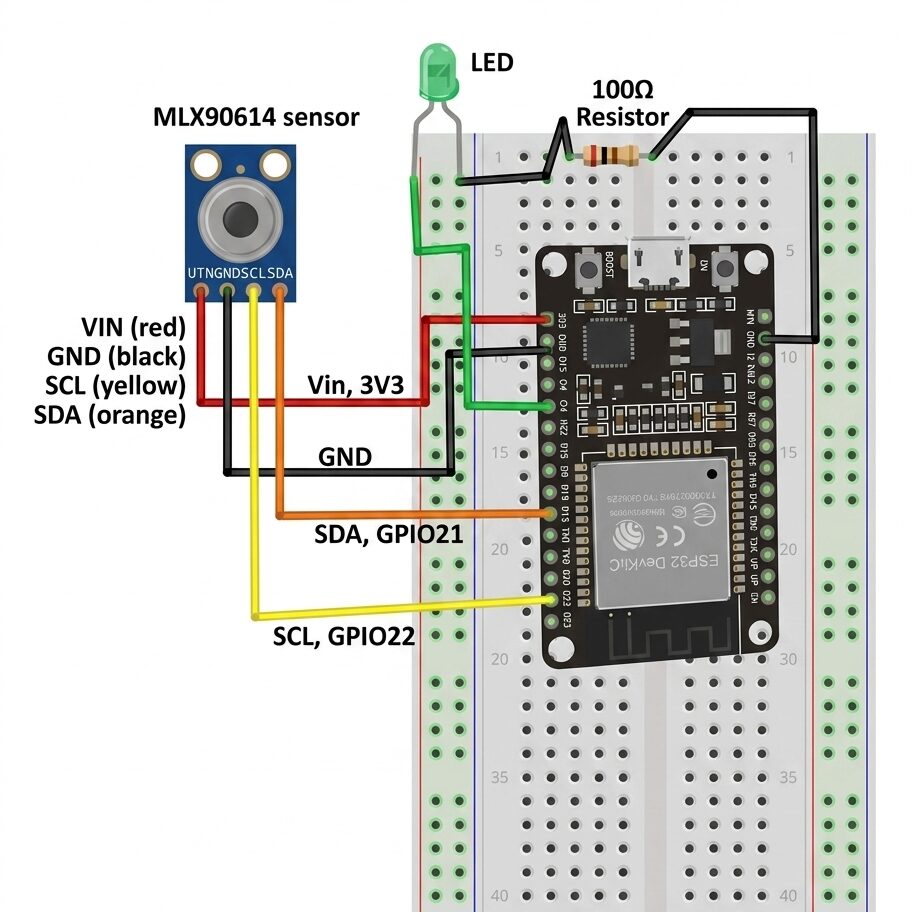
Circuit Diagram
| Pin | Function | ESP32 Connection |
| VIN | Power Supply (3.3V or 5V depending on module version) | 3.3V or 5V |
| GND | Ground | Ground |
| SCL | I2C Clock Line | GPIO 22 (Default I2C SCL) |
| SDA | I2C Data Line | GPIO 21 (Default I2C SDA) |
Required Arduino Libraries
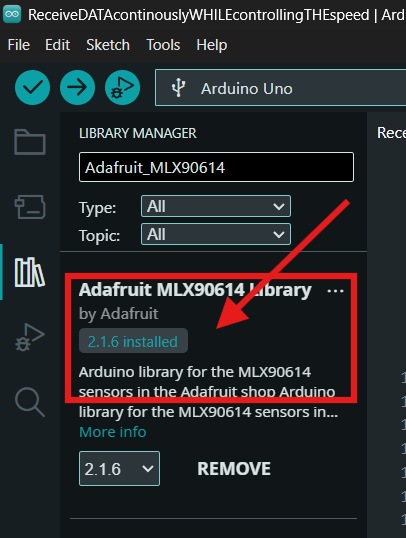
Before uploading the sketch, open your Arduino IDE and install the required library:
- Go to Tools → Manage Libraries…
- Search for Adafruit MLX90614 and click Install.
- (Built-in) BluetoothSerial comes pre-installed with the ESP32 board package.
Arduino code
#include "BluetoothSerial.h"
#include <Adafruit_MLX90614.h>

// Check if Bluetooth configs are enabled
#if !defined(CONFIG_BT_ENABLED) || !defined(CONFIG_BLUEDROID_ENABLED)
#error Bluetooth is not enabled! Please run `make menuconfig` to and enable it
#endif

// MLX90614 object
Adafruit_MLX90614 mlx = Adafruit_MLX90614();

// Bluetooth Serial object
BluetoothSerial SerialBT;

// GPIO where DC motor is connected
const int dcmotor = 4;

// Handle received and sent messages
String message = "";
char incomingChar;

unsigned long lastSendTime = 0;
const unsigned long sendInterval = 1000; // 1 second

void setup() {
  pinMode(dcmotor, OUTPUT);
  Serial.begin(115200);

  // Start MLX90614
  if (!mlx.begin()) {
    Serial.println("Error connecting to MLX90614 sensor. Check wiring.");
    while (1);
  }

  // Bluetooth device name
  SerialBT.begin("ESP32");
  Serial.println("The device started, now you can pair it with Bluetooth!");
}

void loop() {
  // Read Bluetooth commands (motor speed)
  if (SerialBT.available()) {
    incomingChar = SerialBT.read();
    if (incomingChar != '\n') {
      message += String(incomingChar);
    } else {
      message.trim(); // Remove trailing newline/spaces
      Serial.println("Received: " + message);

      // Handle motor speed commands
      if (message == "0") {
        analogWrite(dcmotor, 0);
        Serial.println("Motor stopped");
      } else if (message == "63") {
        analogWrite(dcmotor, 63);
        Serial.println("Motor speed: 63");
      } else if (message == "126") {
        analogWrite(dcmotor, 126);
        Serial.println("Motor speed: 126");
      } else if (message == "189") {
        analogWrite(dcmotor, 189);
        Serial.println("Motor speed: 189");
      } else if (message == "252") {
        analogWrite(dcmotor, 252);
        Serial.println("Motor speed: 252");
      }

      message = ""; // Clear message after processing
    }
    Serial.write(incomingChar);
  }

  // Every 1 second: send temperatures via Bluetooth
  if (millis() - lastSendTime >= sendInterval) {
    lastSendTime = millis();

    float ambientTemp = mlx.readAmbientTempC();
    float objectTemp  = mlx.readObjectTempC();

    String tempString = "Ambient: " + String(ambientTemp, 2) + "°C | Object: " + String(objectTemp, 2) + "°C";
    SerialBT.println(tempString);
    Serial.println(tempString);
  }

  delay(10); // Small delay to stabilize loop
}
Bluetooth download and configuration
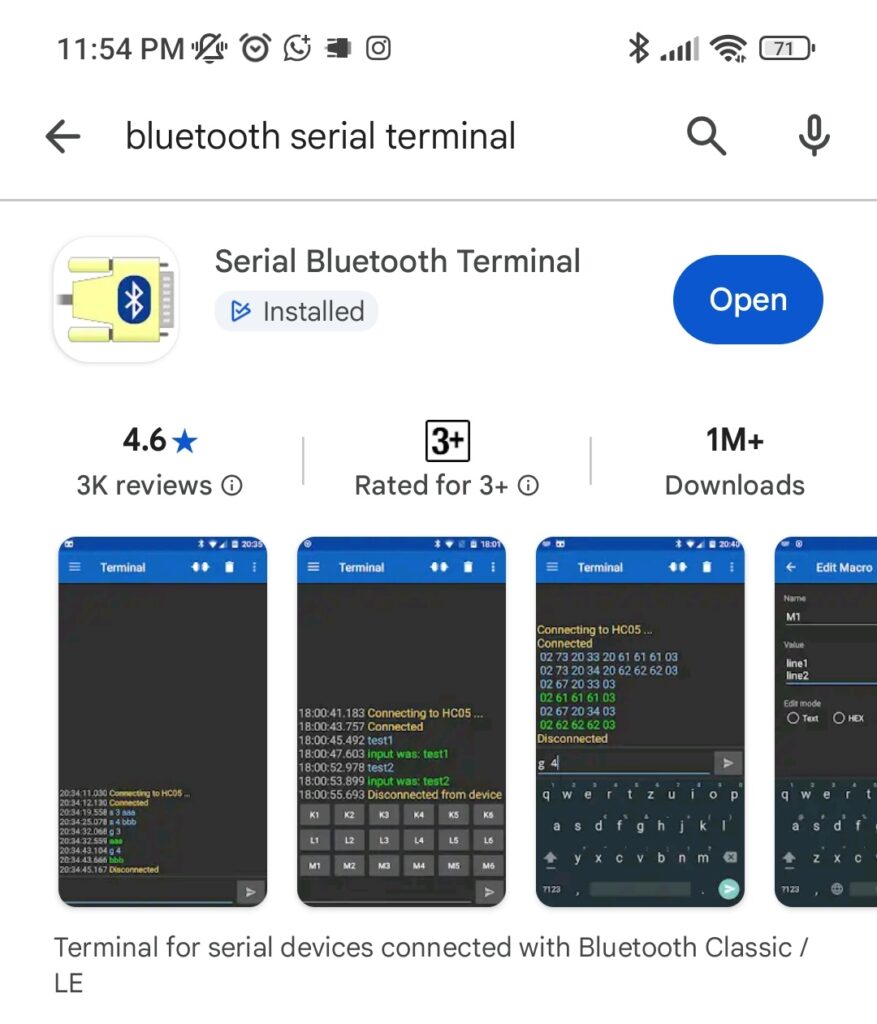
Download Serial Bluetooth Terminal mobile app version:1.52
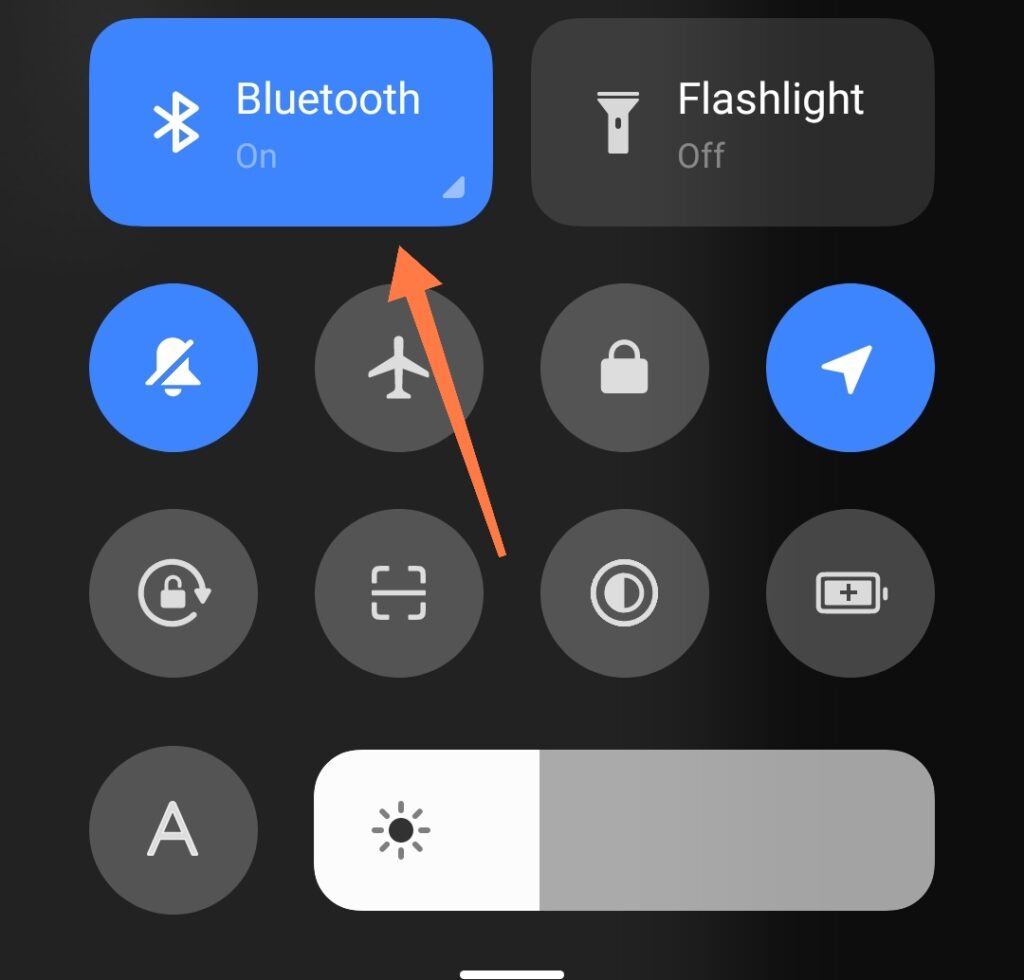
Turn on Bluetooth on your mobile phone
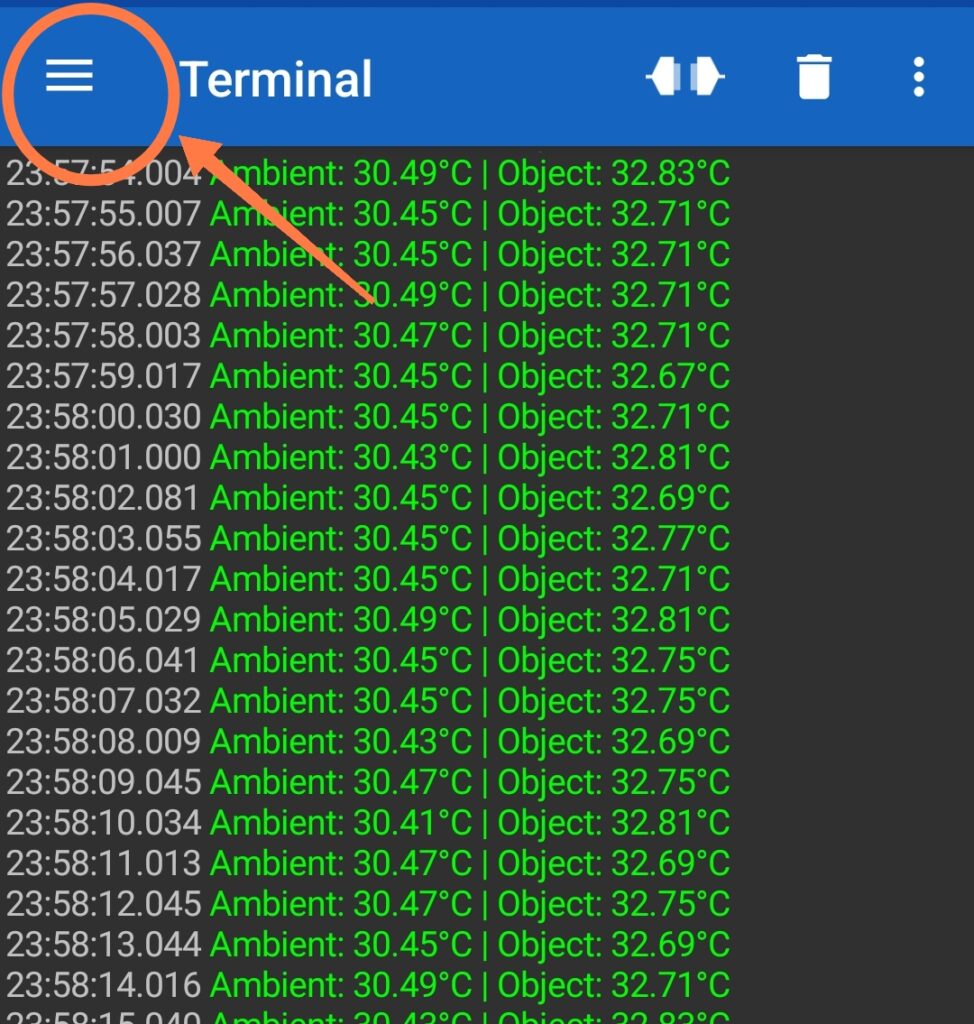
In the Serial Bluetooth Terminal mobile app, click on the three lines
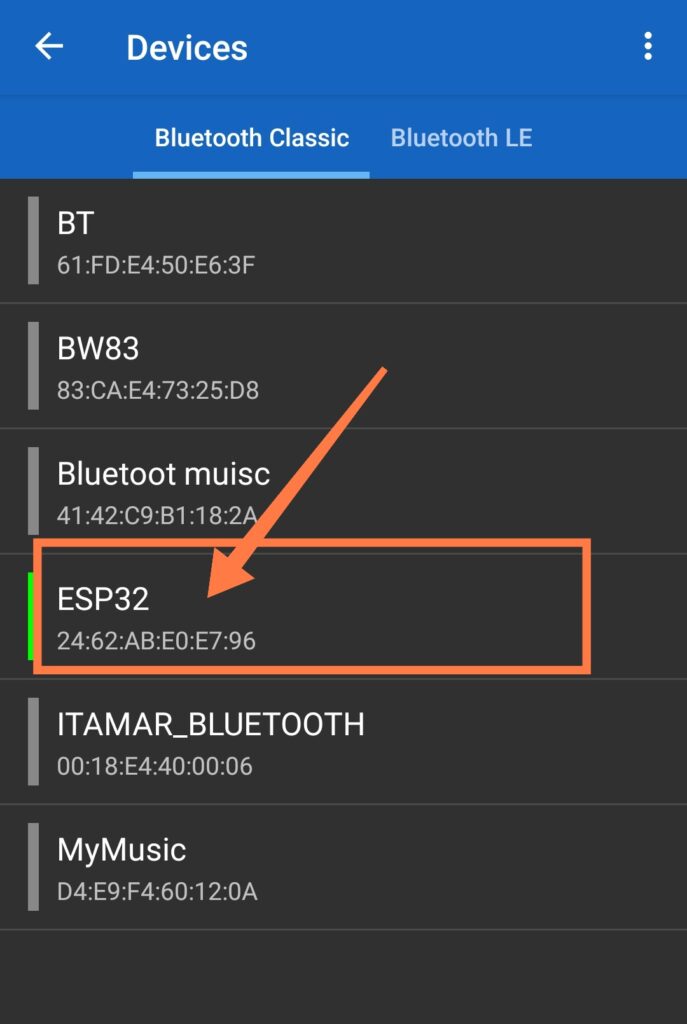
Bluetooth Pairing: Under the designation ESP32, the ESP32 sets up Classic Bluetooth. Any PC or Android Bluetooth Serial Terminal app can be used to connect to it.
How It Works
Periodic Temperature Streaming: Every 1,000 milliseconds (1 second), non-blocking timing using millis() reads the ambient and target object temperatures without causing the loop to stall.
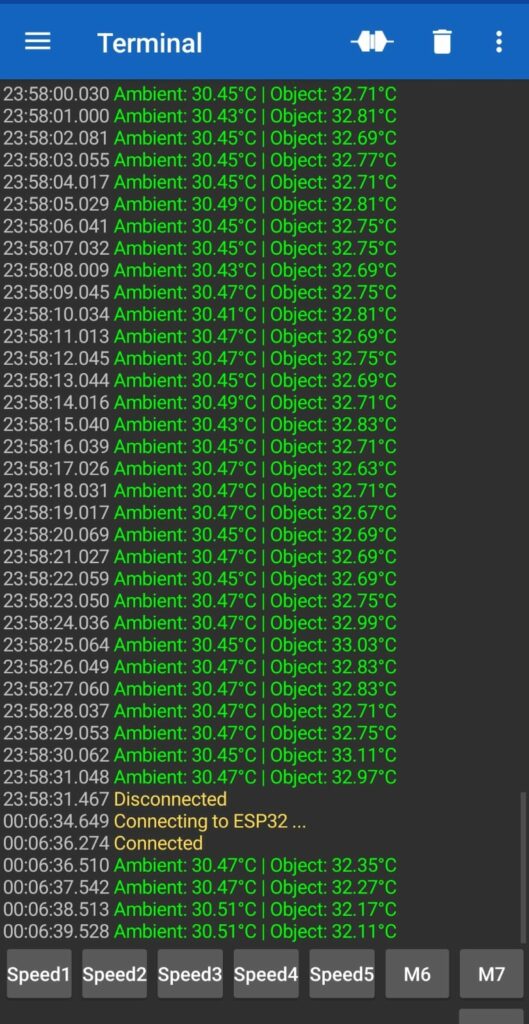
Dual Output: Formatted strings (Ambient: XX.XX°C | Object: XX.XX°C) are transmitted simultaneously to your smartphone via Bluetooth and the hardware Serial Monitor (USB).
Wireless Brightness Control: analogWrite() modifies the PWM duty cycle on GPIO 4 when you transmit numeric commands (0, 63, 126, 189, or 252) followed by a newline over Bluetooth. This allows you to directly control the LED brightness levels (0% to 100%).